Writing a 2D Platform Game in Nim with SDL2
2016-06-14 · HookRace · Nim · DDNet · ProgrammingIn this article we’re going to write a simple 2D platform game. You can also consider this as a tutorial for game development with SDL2 in Nim.
We will read in user input, display graphics and a tile map, and simulate simple 2D physics with collision detection and handling. Afterwards we will implement simple camera movement and game logic. To display some information we will render texts and develop a caching mechanism for said text rendering.
The final result will be a binary file that requires only SDL2 and can be easily distributed, perfect for games. If you’re on Linux we will also present a simple way to cross-compile Nim programs for Windows.
For the sake of simplicity we’re going to use the familiar graphics from DDNet and Teeworlds, with the end result of this tutorial looking like this:
We’re going to follow along with the development throughout this article with illustrative images and videos, but the best way to learn is if you follow along yourself by implementing the steps from this article. The code is purposefully kept simple and easy to extend so that you can play around with it and try out all kinds of changes to get an intuitive understanding. At the end of every section there is a link to its full source code.
The iterations of the code of this article and the final result are available in a repository on GitHub. The resulting binaries can be downloaded here: Win64, Win32, Linux x86_64, Linux x86
Preliminaries
For this post we require:
- The Nim programming language and its package manager Nimble
- SDL 2, SDL_image 2, SDL_ttf 2 (all for developers)
- Nim SDL2 wrapper and strfmt, which can be installed using Nimble
On a unixoid system like Linux or Mac OS X the installation looks something like this:
# Debian / Ubuntu
$ sudo apt-get install git libsdl2-dev libsdl2-image-dev libsdl2-ttf-dev
# Arch Linux
$ pacman -S git sdl2 sdl2_image sdl2_ttf
# Homebrew on OS X
$ brew install git sdl2 sdl2_image sdl2_ttf
# FreeBSD
$ pkg install git sdl2 sdl2_image sdl2_ttf

$ wget http://nim-lang.org/download/nim-0.14.2.tar.xz
$ tar xvf nim-0.14.2.tar.xz
$ cd nim-0.14.2
$ make -j4
$ echo 'export PATH=$HOME/nim-0.14.2/bin:$PATH' >> ~/.profile
$ source ~/.profile

$ git clone https://github.com/nim-lang/nimble.git
$ cd nimble
$ nim -d:release c -r src/nimble install
$ echo 'export PATH=$HOME/.nimble/bin:$PATH' >> ~/.profile
$ source ~/.profile

$ nimble install sdl2 strfmt
Note that you also need a C compiler on your system, preferably GCC or Clang.
Instead of compiling Nim and Nimble from source code you could also use your package manager to install Nim and Nimble if they’re available in a recent version.
For setting up SDL2 on other platforms more extensive guides exist, as do for Nim and nimble.
1. First Running Program
If you have seen SDL2 programs written in C or C++ before, you will notice that what we’re doing in Nim is very similar. Actually Nim’s SDL2 wrapper is just a thin layer wrapping the original SDL2 interface from C. This has the advantage that what you learn from any SDL2 tutorial is applicable, but the disadvantage is that you end up with a bit more boilerplate than with a more high-level Nim library.
We start with exactly this boilerplate to initialize our window:
import sdl2

type SDLException = object of Exception

template sdlFailIf(cond: typed, reason: string) =
  if cond: raise SDLException.newException(
    reason & ", SDL error: " & $getError())

proc main =
  sdlFailIf(not sdl2.init(INIT_VIDEO or INIT_TIMER or INIT_EVENTS)):
    "SDL2 initialization failed"

  # defer blocks get called at the end of the procedure, even if an
  # exception has been thrown
  defer: sdl2.quit()

  sdlFailIf(not setHint("SDL_RENDER_SCALE_QUALITY", "2")):
    "Linear texture filtering could not be enabled"

  let window = createWindow(title = "Our own 2D platformer",
    x = SDL_WINDOWPOS_CENTERED, y = SDL_WINDOWPOS_CENTERED,
    w = 1280, h = 720, flags = SDL_WINDOW_SHOWN)
  sdlFailIf window.isNil: "Window could not be created"
  defer: window.destroy()

  let renderer = window.createRenderer(index = -1,
    flags = Renderer_Accelerated or Renderer_PresentVsync)
  sdlFailIf renderer.isNil: "Renderer could not be created"
  defer: renderer.destroy()

  # Set the default color to use for drawing
  renderer.setDrawColor(r = 110, g = 132, b = 174)

  # Game loop, draws each frame
  while true:
    # Draw over all drawings of the last frame with the default
    # color
    renderer.clear()
    # Show the result on screen
    renderer.present()

main()
We introduced an sdlFailIf template that checks a condition and if the
condition is true, raises an SDLException with additional error information
from SDL. In the main proc we initialize SDL2, and create a regular window
and an accelerated 2D renderer. Error handling is done with the sdlFailIf
proc that we introduced.
For now the game loop just clears the window and draws it every frame. If you have VSync enabled and your screen is set to 60 Hz the loop will be executed 60 times per second.
We can compile and run in the same step by executing nim -r c platformer,
assuming you called the file platformer.nim. To compile with optimizations
use nim -d:release -r c platformer. The result is a simple one-colored
window:

We can exit our small program by pressing Ctrl-C in the terminal window. Unfortunately we can’t exit it in the game window itself yet, so let’s fix that.
2. User Input
First let’s add an Input type to store all the inputs we want to support, and
store an array of Inputs in our game state object:
type
  Input {.pure.} = enum none, left, right, jump, restart, quit

  Game = ref object
    inputs: array[Input, bool]
    renderer: RendererPtr
By choosing a ref type for the Game state type we have an easy way to
prevent accidentally creating copies of it. By default only the garbage
collected pointer to our Game object is passed around. The inputs field is an
array mapping from Input to bool, signifying which input is currently
pressed (true) or not (false). Creating a new game state object is trivial,
we just create a new heap object for now and assign the SDL2 renderer that we
will need later:
proc newGame(renderer: RendererPtr): Game =
  new result
  result.renderer = renderer
We don’t need to initialize the inputs field in any way as everything is
initialized to binary null by default, which is exactly what we want: Every
input is set to off in the start. If we didn’t initialize the renderer field
it would be a null pointer and we would get into trouble if we accidentally
dereference it.
The next thing we need is a procedure that maps keyboard scan codes to our recognized inputs:
proc toInput(key: Scancode): Input =
  case key
  of SDL_SCANCODE_A: Input.left
  of SDL_SCANCODE_D: Input.right
  of SDL_SCANCODE_SPACE: Input.jump
  of SDL_SCANCODE_R: Input.restart
  of SDL_SCANCODE_Q: Input.quit
  else: Input.none
Note that toInput returns Input.none for all undefined cases. We will use
this behaviour to ignore unused keyboard inputs without the need for a branch
in our code. You could easily recognize multiple scan codes to map to a single
input.
We modify the game loop to react to keyboard inputs by calling our new
handleInput proc. We also split out the rendering itself to keep the
separation of concerns clear in the main proc:
proc handleInput(game: Game) =
  var event = defaultEvent
  while pollEvent(event):
    case event.kind
    of QuitEvent:
      game.inputs[Input.quit] = true
    of KeyDown:
      game.inputs[event.key.keysym.scancode.toInput] = true
    of KeyUp:
      game.inputs[event.key.keysym.scancode.toInput] = false
    else:
      discard

proc render(game: Game) =
  # Draw over all drawings of the last frame with the default color
  game.renderer.clear()
  # Show the result on screen
  game.renderer.present()

var game = newGame(renderer)

# Game loop, draws each frame
while not game.inputs[Input.quit]:
  game.handleInput()
  game.render()
Now we can either press q or use the close button on the window to close
the game. Other kinds of user input are just stored in the inputs array for
now and we will be able to use it later.
Note that the inputs array is intentionally a simple array, so that access to it is as performant as can be. If we used a hash table or some other data structure such a guarantee would not be that easy to make. Simplicity can often be beneficial and make it easier to understand what is going on in the system you’re developing.
3. Displaying Graphics
If we want to do something of interest with those user inputs we need to start displaying something other than a blue sky.
We extend our game state object to also store the player texture as well as the current position and velocity, for which we use the basic2d module:
import basic2d
type
Player = ref object
texture: TexturePtr
pos: Point2d
vel: Vector2d
Game = ref object
inputs: array[Input, bool]
renderer: RendererPtr
player: Player
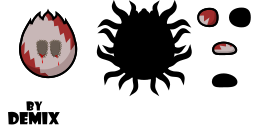
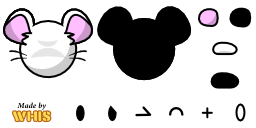
camera: Vector2dWe’re going to use Teeworlds’ default tee graphic for our player:
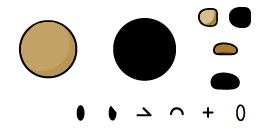
You can save this file as player.png to follow along. If you feel funny you can also select one of hundreds of skins from the DDNet Skin Database, for example:


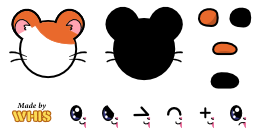
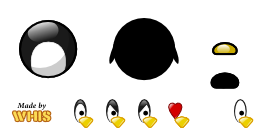


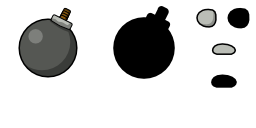


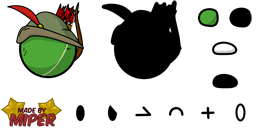


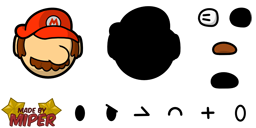
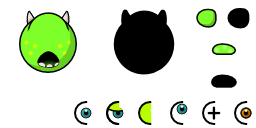

Don’t forget to call your player graphic player.png if you want to use an
alternative one.
First we have to load the player graphic, whichever one you decided to use, in
our definition of newGame and initialize the Game and Player data
structures:
import sdl2/image

proc restartPlayer(player: Player) =
  player.pos = point2d(170, 500)
  player.vel = vector2d(0, 0)

proc newPlayer(texture: TexturePtr): Player =
  new result
  result.texture = texture
  result.restartPlayer()

proc newGame(renderer: RendererPtr): Game =
  new result
  result.renderer = renderer
  result.player = newPlayer(renderer.loadTexture("player.png"))
restartPlayer is used to reset the player to its start position. The
loadTexture procedure loads the PNG image into memory as an SDL2 texture that
we can store in the Game object.
We also shouldn’t forget to initialize the SDL2 image module in our main
proc, similarly to the SDL2 initialization:
const imgFlags: cint = IMG_INIT_PNG
sdlFailIf(image.init(imgFlags) != imgFlags):
  "SDL2 Image initialization failed"
defer: image.quit()
We only need support for PNG files, otherwise we could also add JPEG files with
const imgFlags: cint = IMG_INIT_PNG or IMG_INIT_JPG.
Next our task is to put this together nicely. Of course the intention of the flexible player images is that parts of the body can move independently, but for the sake of simplicity we will put them into fixed positions. A simple addition would be to make the feet move in a rotating motion depending on the horizontal position of the player. Another addition would be to make the eyes follow the mouse cursor.
proc renderTee(renderer: RendererPtr, texture: TexturePtr,
               pos: Point2d) =
  let
    x = pos.x.cint
    y = pos.y.cint

  var bodyParts: array[8, tuple[source, dest: Rect, flip: cint]] = [
    (rect(192,  64, 64, 32), rect(x-60,    y, 96, 48),
     SDL_FLIP_NONE),      # back feet shadow
    (rect( 96,   0, 96, 96), rect(x-48, y-48, 96, 96),
     SDL_FLIP_NONE),      # body shadow
    (rect(192,  64, 64, 32), rect(x-36,    y, 96, 48),
     SDL_FLIP_NONE),      # front feet shadow
    (rect(192,  32, 64, 32), rect(x-60,    y, 96, 48),
     SDL_FLIP_NONE),      # back feet
    (rect(  0,   0, 96, 96), rect(x-48, y-48, 96, 96),
     SDL_FLIP_NONE),      # body
    (rect(192,  32, 64, 32), rect(x-36,    y, 96, 48),
     SDL_FLIP_NONE),      # front feet
    (rect( 64,  96, 32, 32), rect(x-18, y-21, 36, 36),
     SDL_FLIP_NONE),      # left eye
    (rect( 64,  96, 32, 32), rect( x-6, y-21, 36, 36),
     SDL_FLIP_HORIZONTAL) # right eye
  ]

  for part in bodyParts.mitems:
    renderer.copyEx(texture, part.source, part.dest, angle = 0.0,
                    center = nil, flip = part.flip)
The exact numbers are not so important, they are just how the player is meant
to be put together. With renderTee we define which body part is drawn at
which position and in which order. Finally each of these body parts is drawn
with the SDL2 renderer using copyEx.
Now drawing the tee in our game loop is simply a call to renderTee away:
proc render(game: Game) =
  # Draw over all drawings of the last frame with the default color
  game.renderer.clear()
  # Actual drawing here
  game.renderer.renderTee(game.player.texture,
    game.player.pos - game.camera)
  # Show the result on screen
  game.renderer.present()
Finally we have some visual progress again, look at the player floating in the sky:

4. Tile Map
Now that we have a working rendering system for the player, we need a map to play in. This requires us to store a texture as well as a list of tiles:
type
  Map = ref object
    texture: TexturePtr
    width, height: int
    tiles: seq[uint8]

  Game = ref object
    inputs: array[Input, bool]
    renderer: RendererPtr
    player: Player
    map: Map
    camera: Vector2d
Each tile is defined to be a uint8, which means a value between 0 and 255
inclusively. Conveniently the tileset graphic for from Teeworlds have 16 × 16 =
256 tiles. We will use the grass tileset:
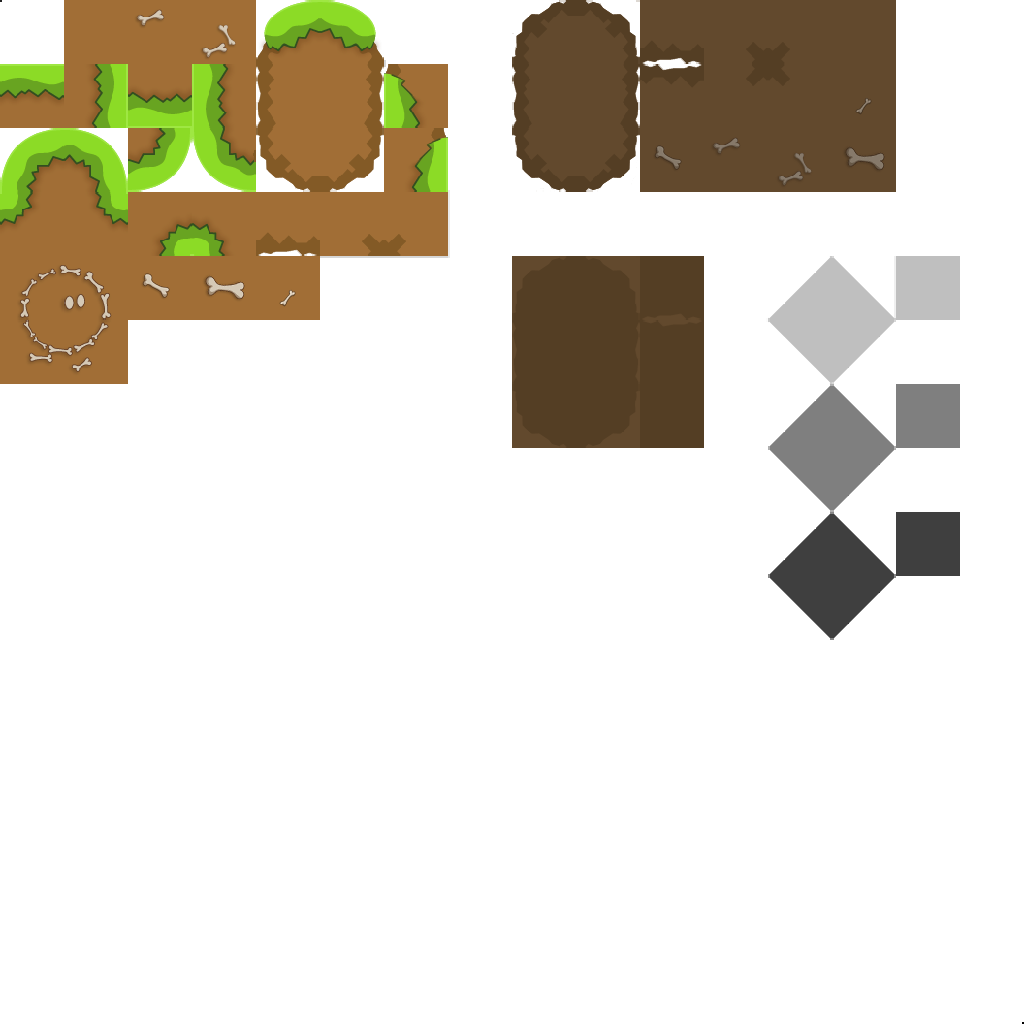
Download and save this image as grass.png.
To initialize the Map data structure we shall write a little parser that
parses maps of this format:
 0  0  0  0 78  0  0  0  0  0  0  0  0  0  0
 4  5  0  0 78  0  0  0  0  0  0  0  0  0  0
20 21  0  0 78  0  0  0  0  0  0  0  0  0  0
20 21  0  0 78  0  0  0  0  0  0  0  0  4  5
20 21  0  0 78  0  0  0  0  0  0  0  0 20 21
20 21  0  0 78  0  0  0  0  0  0  0  0 20 21
20 21  0  0 78  0  0  4  5  0  0  0  0 20 21
20 21  0  0 78  0  0 20 21  0  0  0  0 20 21
20 38  0  0 78  0  0 22 38  0  0  0  0 22 38
20 49 16 16 16 16 16 48 49 16 16 16 16 48 49
36 52 52 52 52 52 52 52 52 52 52 52 52 52 52
Our goal in this section is for this map with the grass tileset to result in this rendering:
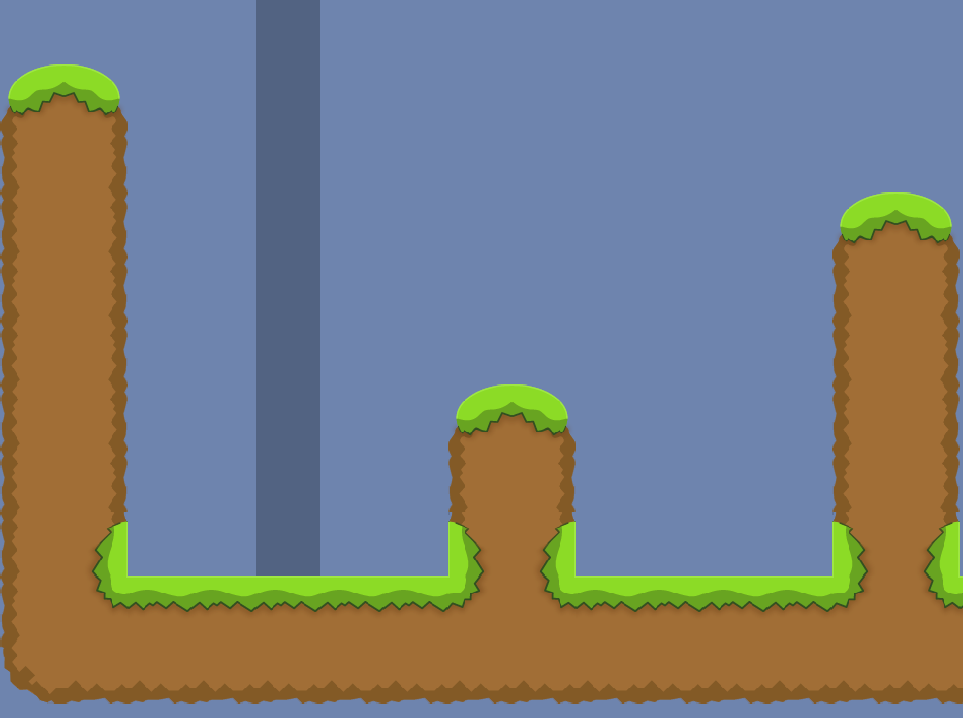
Each number denotes the tile that is chosen from the grass tileset. We will use
this default.map for the rest of this article. Our
parser is implemented in newMap and looks like this:
import strutils

proc newMap(texture: TexturePtr, file: string): Map =
  new result
  result.texture = texture
  result.tiles = @[]

  for line in file.lines:
    var width = 0
    for word in line.split(' '):
      if word == "": continue
      let value = parseUInt(word)
      if value > uint(uint8.high):
        raise ValueError.newException(
          "Invalid value " & word & " in map " & file)
      result.tiles.add value.uint8
      inc width

    if result.width > 0 and result.width != width:
      raise ValueError.newException(
        "Incompatible line length in map " & file)
    result.width = width
    inc result.height
We split the file by line as well as by word. Each number is parsed to an
unsigned integer and checked whether it is in the valid range of 0..255. The
final width and height are calculated from the line length and number of lines.
Errors in the map data cause an exception to be thrown, quitting our game.
We have to extend newGame to initialize the map now:
proc newGame(renderer: RendererPtr): Game =
  new result
  result.renderer = renderer
  result.player = newPlayer(renderer.loadTexture("player.png"))
  result.map = newMap(renderer.loadTexture("grass.png"),
    "default.map")
At this point we have the texture and the tiles of the map. What’s missing is actually rendering all of this:
const
  tilesPerRow = 16
  tileSize: Point = (64.cint, 64.cint)

proc renderMap(renderer: RendererPtr, map: Map, camera: Vector2d) =
  var
    clip = rect(0, 0, tileSize.x, tileSize.y)
    dest = rect(0, 0, tileSize.x, tileSize.y)

  for i, tileNr in map.tiles:
    if tileNr == 0: continue

    clip.x = cint(tileNr mod tilesPerRow) * tileSize.x
    clip.y = cint(tileNr div tilesPerRow) * tileSize.y
    dest.x = cint(i mod map.width) * tileSize.x - camera.x.cint
    dest.y = cint(i div map.width) * tileSize.y - camera.y.cint

    renderer.copy(map.texture, unsafeAddr clip, unsafeAddr dest)
This is similar to renderTee but uses fixed size parts of the texture. The
texture is cut into tiles of size 64 × 64 pixels with 16 tiles per line. We
iterate over each tile in the map and render the tile tileNr from our map
texture with. Tile 0 is the air tile and is always empty so we don’t need to
render it, which improves performance as typical maps are in large parts empty.
Finally we have to render our map in the main proc after rendering the
player, so that it is put on top of the player:
proc render(game: Game) =
  # Draw over all drawings of the last frame with the default color
  game.renderer.clear()
  # Actual drawing here
  game.renderer.renderTee(game.player.texture,
    game.player.pos - game.camera)
  game.renderer.renderMap(game.map, game.camera)
  # Show the result on screen
  game.renderer.present()
For now we don’t have a moving camera, so we use the static game.camera to
get a fixed rendering position. But for now we can’t even move, so we should
finally do something with the user input and implement a simple physics model.
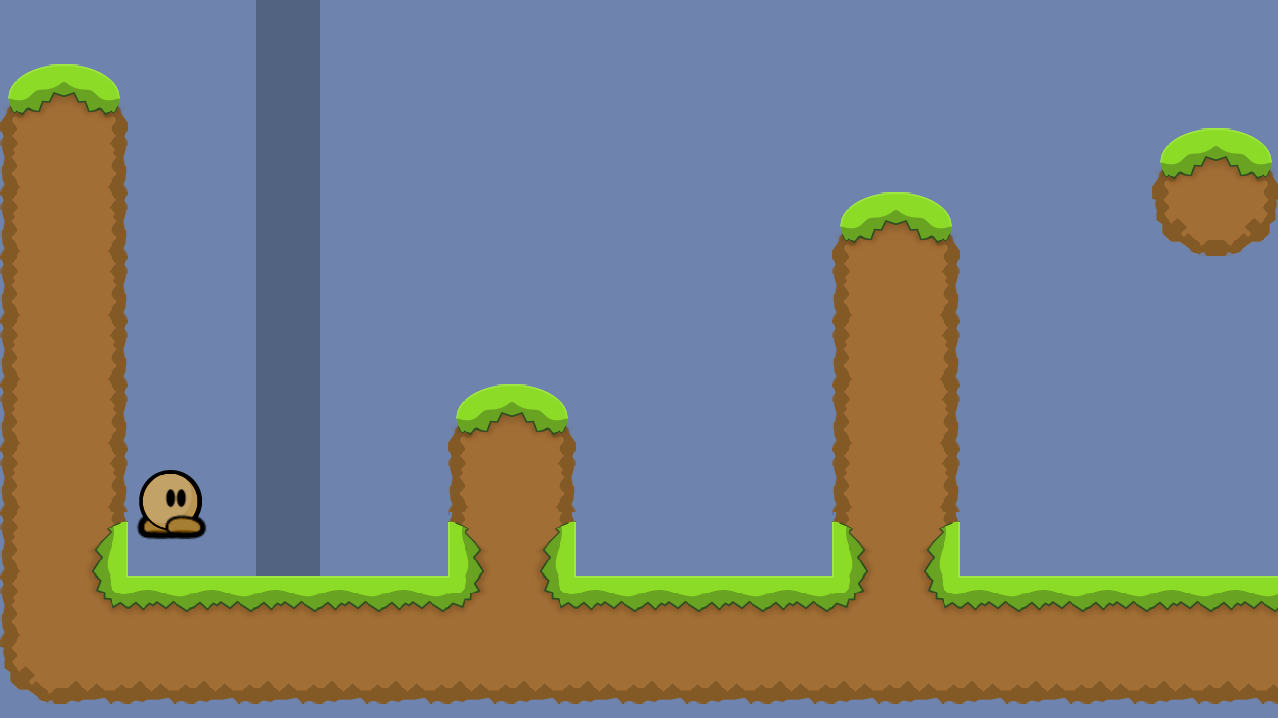
The end result of this section features our beautiful map rendering:
5. Physics and Collisions
For our game physics we decide to have 50 ticks per second. We will only
calculate the next iteration of the game when a new tick has arrived,
independent of whether our game runs at 60 fps or even 240 fps. Let’s add the
ticks to our main proc:
import times

proc physics(game: Game) =
  discard

var
  startTime = epochTime()
  lastTick = 0

while not game.inputs[Input.quit]:
  game.handleInput()

  let newTick = int((epochTime() - startTime) * 50)
  for tick in lastTick+1 .. newTick:
    game.physics()
  lastTick = newTick

  renderer.render(game)
That’s our physics framework, but so far the physics does nothing. We can start by adding gravity:
proc physics(game: Game) =
  game.player.vel.y += 0.75
  game.player.pos += game.player.vel
Well, there goes our player. I guess we also need to be able to restart the player now, so that we can see this amazing animation again and again just by pressing r:
proc physics(game: Game) =
  if game.inputs[Input.restart]:
    game.player.restartPlayer()

  game.player.vel.y += 0.75
  game.player.pos += game.player.vel
This looks exactly like the previous GIF on repeat, so you can imagine it or click on play a few times.
Moving left and right with a and d as well as jumping with space is now easy to implement:
proc physics(game: Game) =
  if game.inputs[Input.restart]:
    game.player.restartPlayer()

  if game.inputs[Input.jump]:
    game.player.vel.y = -21

  let direction = float(game.inputs[Input.right].int -
                        game.inputs[Input.left].int)

  game.player.vel.y += 0.75
  game.player.vel.x = clamp(
    0.5 * game.player.vel.x + 4.0 * direction, -8, 8)

  game.player.pos += game.player.vel
The specific values are determined by trial and error. You can change them around if you have other preferences. Note that we don’t set the player position directly, instead we modify the velocity vector and add that to the position. This is important for collision detection.
While I tried to move around as if the walls and ground had an effect, I
probably failed at deceiving you and you noticed that we still don’t have any
collision detection and handling. This code is largely adapted from Teeworlds.
It works by checking for horizontal and vertical collisions with a tile in
moveBox, which manipulates the player’s position based on the passed velocity vector.
When a collision occurs the player is moved just out of the tile in the right
direction. For the sake of simplicity in isSolid we consider every tile other
than air, start, finish a solid block. Floating point player positions are
converted to indices in the tile map.
import math

type
  Collision {.pure.} = enum x, y, corner

const
  playerSize = vector2d(64, 64)

  air = 0
  start = 78
  finish = 110
getTile reads a tile from a specified position of the map, making sure not to
over- or underflow:
proc getTile(map: Map, x, y: int): uint8 =
  let
    nx = clamp(x div tileSize.x, 0, map.width - 1)
    ny = clamp(y div tileSize.y, 0, map.height - 1)
    pos = ny * map.width + nx

  map.tiles[pos]
isSolid determines whether the player can collide with a tile. As we said
every tile other than air, start and finish are able to be collided with:
proc isSolid(map: Map, x, y: int): bool =
  map.getTile(x, y) notin {air, start, finish}

proc isSolid(map: Map, point: Point2d): bool =
  map.isSolid(point.x.round.int, point.y.round.int)
A player is on the ground when there is a block below either side of its feet:
proc onGround(map: Map, pos: Point2d, size: Vector2d): bool =
  let size = size * 0.5
  result =
    map.isSolid(point2d(pos.x - size.x, pos.y + size.y + 1)) or
    map.isSolid(point2d(pos.x + size.x, pos.y + size.y + 1))
Meanwhile testBox considers the player as an axis aligned boundary box, and
tells us if the player is stuck inside of any solid walls:
proc testBox(map: Map, pos: Point2d, size: Vector2d): bool =
  let size = size * 0.5
  result =
    map.isSolid(point2d(pos.x - size.x, pos.y - size.y)) or
    map.isSolid(point2d(pos.x + size.x, pos.y - size.y)) or
    map.isSolid(point2d(pos.x - size.x, pos.y + size.y)) or
    map.isSolid(point2d(pos.x + size.x, pos.y + size.y))
moveBox now tries to apply the velocity vector vel to the player’s position
pos. When this causes a collision the code tries to move the player only
along the x axis, then only along the y axis, to find out which side of the
tile the player collided with. If the player did not collide with any of the
sides it hit a corner (that’s the real corner case!):
proc moveBox(map: Map, pos: var Point2d, vel: var Vector2d,
             size: Vector2d): set[Collision] {.discardable.} =
  let distance = vel.len
  let maximum = distance.int

  if distance < 0:
    return

  let fraction = 1.0 / float(maximum + 1)

  for i in 0 .. maximum:
    var newPos = pos + vel * fraction

    if map.testBox(newPos, size):
      var hit = false

      if map.testBox(point2d(pos.x, newPos.y), size):
        result.incl Collision.y
        newPos.y = pos.y
        vel.y = 0
        hit = true

      if map.testBox(point2d(newPos.x, pos.y), size):
        result.incl Collision.x
        newPos.x = pos.x
        vel.x = 0
        hit = true

      if not hit:
        result.incl Collision.corner
        newPos = pos
        vel = vector2d(0, 0)

    pos = newPos
The moveBox proc also returns a set of collisions, telling us what kind of
collisions happened in this iteration. We don’t use that information, but it
could be useful if you want to handle collisions in a special way instead of
just pushing the player out of the collided wall.
Finally we can use onGround and moveBox:
proc physics(game: Game) =
  if game.inputs[Input.restart]:
    game.player.restartPlayer()

  let ground = game.map.onGround(game.player.pos, playerSize)

  if game.inputs[Input.jump]:
    if ground:
      game.player.vel.y = -21

  let direction = float(game.inputs[Input.right].int -
                        game.inputs[Input.left].int)

  game.player.vel.y += 0.75
  if ground:
    game.player.vel.x = 0.5 * game.player.vel.x + 4.0 * direction
  else:
    game.player.vel.x = 0.95 * game.player.vel.x + 2.0 * direction
  game.player.vel.x = clamp(game.player.vel.x, -8, 8)

  game.map.moveBox(game.player.pos, game.player.vel, playerSize)
Jumping is only possible when standing on the ground. Horizontal movement in the air is calculated in a different way than on the ground, simulating different air and ground friction.
6. Camera
Did you see me disappear out of the window? Nice, right?! Well, actually that
probably makes playing the rest of the map rather difficult. So while we can
move nicely, the camera’s position is still fixed. In this section we will only
make the camera move horizontally. With this information you can probably
figure out how to make it move vertically as well if you want to. We only need
to set the camera position when our player moved, right after calling
game.physics():
const
  windowSize: Point = (1280.cint, 720.cint)

proc moveCamera(game: Game) =
  const halfWin = float(windowSize.x div 2)
  game.camera.x = game.player.pos.x - halfWin

for tick in lastTick+1 .. newTick:
  game.physics()
  game.moveCamera()
Now the camera always immediately follows the player’s horizontal position. Another approach for the camera is to have it follow the player only once the player leaves the center area of the screen, in this case 200 pixels:
proc moveCamera(game: Game) =
  const halfWin = float(windowSize.x div 2)
  let
    leftArea  = game.player.pos.x - halfWin - 100
    rightArea = game.player.pos.x - halfWin + 100
  game.camera.x = clamp(game.camera.x, leftArea, rightArea)
An alternative approach is to have the camera follow the player fluidly. When the player is further away from the center the camera moves towards him faster. You can imagine the camera as being pulled by a rubber band connecting it to the player, the further away they get, the stronger the camera gets pulled to the player:
proc moveCamera(game: Game) =
  const halfWin = float(windowSize.x div 2)
  let dist = game.camera.x - game.player.pos.x + halfWin
  game.camera.x -= 0.05 * dist
Choices are difficult so we can just implement all three and you can choose at
compile time using -d:fluidCamera and -d:innerCamera:
proc moveCamera(game: Game) =
  const halfWin = float(windowSize.x div 2)
  when defined(fluidCamera):
    let dist = game.camera.x - game.player.pos.x + halfWin
    game.camera.x -= 0.05 * dist
  elif defined(innerCamera):
    let
      leftArea  = game.player.pos.x - halfWin - 100
      rightArea = game.player.pos.x - halfWin + 100
    game.camera.x = clamp(game.camera.x, leftArea, rightArea)
  else:
game.camera.x = game.player.pos.x - halfWin7. Game State
Now that we can run around all of the map with the camera keeping up with us,
we should give our game a purpose. You might have noticed the light and dark
gray lines at the beginning and end of the map, suspiciously referred to as
start and finish respectively. As you can probably guess we will use those
as start and finish lines and record how quickly the player can get from start
to finish:
type
  Time = ref object
    begin, finish, best: int

  Player = ref object
    texture: TexturePtr
    pos: Point2d
    vel: Vector2d
    time: Time

proc restartPlayer(player: Player) =
  player.pos = point2d(170, 500)
  player.vel = vector2d(0, 0)
  player.time.begin = -1
  player.time.finish = -1

proc newTime: Time =
  new result
  result.finish = -1
  result.best = -1

proc newPlayer(texture: TexturePtr): Player =
  new result
  result.texture = texture
  result.time = newTime()
  result.restartPlayer()
We’re now storing a Time object in the Player, telling us when the player
began playing this round, how he finished last time and what his absolute best
time is. By default the values are initialized to -1 to indicate an invalid
value, otherwise they store ticks.
To format the time for display we use the excellent strfmt library’s string interpolation:
import strfmt

proc formatTime(ticks: int): string =
  let
    mins = (ticks div 50) div 60
    secs = (ticks div 50) mod 60
    cents = (ticks mod 50) * 2
  interp"${mins:02}:${secs:02}:${cents:02}"
Our game logic works as follows:
- When the player walks through a start tile his time begins
- When the player walks through a finish tile his finish time is set and printed to the terminal. If it is a new best time, so is his best time. The start time is reset.
proc getTile(map: Map, pos: Point2d): uint8 =
  map.getTile(pos.x.round.int, pos.y.round.int)

proc logic(game: Game, tick: int) =
  template time: untyped = game.player.time
  case game.map.getTile(game.player.pos)
  of start:
    time.begin = tick
  of finish:
    if time.begin >= 0:
      time.finish = tick - time.begin
      time.begin = -1
      if time.best < 0 or time.finish < time.best:
        time.best = time.finish
      echo "Finished in ", formatTime(time.finish)
  else: discard
We need to call the logic in our main proc of course:
for tick in lastTick+1 .. newTick:
  game.physics()
  game.moveCamera()
  game.logic(tick)
Now we can play through the map and finally get an output like this on the terminal:
Finished in 00:04:38
8. Text Rendering
It would be much nicer to have the text output with the result in the actual game window instead of on the terminal. For this we will now use SDL_ttf:
import sdl2/ttf

proc renderText(renderer: RendererPtr, font: FontPtr, text: string,
                x, y: cint, color: Color) =
  let surface = font.renderUtf8Solid(text.cstring, color)
  sdlFailIf surface.isNil: "Could not render text surface"

  discard surface.setSurfaceAlphaMod(color.a)

  var source = rect(0, 0, surface.w, surface.h)
  var dest = rect(x, y, surface.w, surface.h)
  let texture = renderer.createTextureFromSurface(surface)

  sdlFailIf texture.isNil:
    "Could not create texture from rendered text"

  surface.freeSurface()

  renderer.copyEx(texture, source, dest, angle = 0.0, center = nil,
                  flip = SDL_FLIP_NONE)

  texture.destroy()

proc renderText(game: Game, text: string,
                x, y: cint, color: Color) =
  const outlineColor = color(0, 0, 0, 64)
  game.renderer.renderText(game.font, text, x, y, color)
What’s happening here is that we render a text with a FontPtr to an SDL2
surface (stored in RAM), which is then put into a texture (stored in GPU’s
VRAM). This texture is then rendered to the screen at the defined position.
proc render(game: Game, tick: int) =
  # Draw over all drawings of the last frame with the default color
  game.renderer.clear()
  # Actual drawing here
  game.renderer.renderTee(game.player.texture,
    game.player.pos - game.camera)
  game.renderer.renderMap(game.map, game.camera)

  let time = game.player.time
  const white = color(255, 255, 255, 255)
  if time.begin >= 0:
    game.renderText(formatTime(tick - time.begin), 50, 100, white)
  elif time.finish >= 0:
    game.renderText("Finished in: " & formatTime(time.finish),
      50, 100, white)
  if time.best >= 0:
    game.renderText("Best time: " & formatTime(time.best),
      50, 150, white)

  # Show the result on screen
  game.renderer.present()
We need to initialize the TTF subsystem and now we also need to pass the
current tick to render inside of our main function:
sdlFailIf(ttfInit() == SdlError): "SDL2 TTF initialization failed"
defer: ttfQuit()

...

game.render(lastTick)
As well as loading our DejaVuSans.ttf font inside of newGame:
result.font = openFont("DejaVuSans.ttf", 28)
sdlFailIf result.font.isNil: "Failed to load font"
The Game object now looks like this, including a font:
type
  Game = ref object
    inputs: array[Input, bool]
    renderer: RendererPtr
    font: FontPtr
    player: Player
    map: Map
    camera: Vector2d
This is what the text rendering looks like after finishing the map:
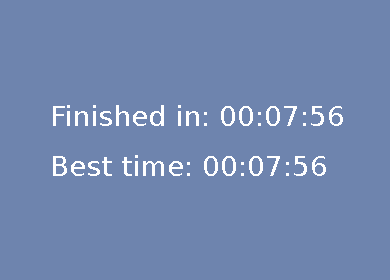
It noticeably doesn’t look all that great. The border of the text looks rugged.
This happens because renderUtf8Solid does not use alpha blending, which is
expensive. Instead every pixel is either entirely white or entirely
transparent, never anything half-transparent in between. If we had a fixed
background color for the text we could use renderUtf8Shaded, which takes a
background color. If we want nicer output with dynamic backgrounds we can use
renderUtf8Blended instead:
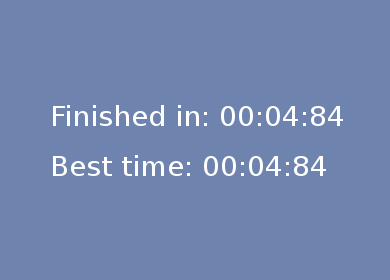
This looks better, but would be hard to see with a brighter background. We can draw an outline for our text to fix this, basically by drawing the text twice, once in half-transparent black and once in the proper color on top:
proc renderText(renderer: RendererPtr, font: FontPtr, text: string,
                x, y, outline: cint, color: Color) =
  font.setFontOutline(outline)
  let surface = font.renderUtf8Blended(text.cstring, color)
  sdlFailIf surface.isNil: "Could not render text surface"

  discard surface.setSurfaceAlphaMod(color.a)

  var source = rect(0, 0, surface.w, surface.h)
  var dest = rect(x - outline, y - outline, surface.w, surface.h)
  ...

proc renderText(game: Game, text: string,
                x, y: cint, color: Color) =
  const outlineColor = color(0, 0, 0, 64)
  game.renderer.renderText(game.font, text, x, y, 2, outlineColor)
  game.renderer.renderText(game.font, text, x, y, 0, color)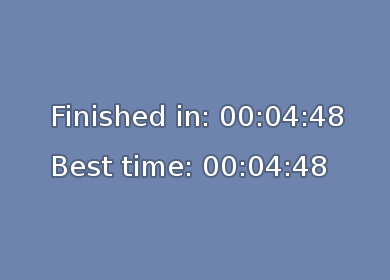
9. Text Caching
If you looked at your CPU usage during this tutorial so far you might have noticed that the game needed nearly no CPU at all, about 3 % for 60 fps on my system. Once the texts are rendered this increases to 20% though. The reason for this is that right now we are regenerating the text textures every single frame, even if it didn’t change from the last frame. If you have fixed texts you can simply save the textures instead of recalculating them. But if you want more flexibility instead you can use a glyph or texture caching system. An example of such a system would be SDL_FontCache.
But instead we can write a little application-specific caching scheme in Nim. The heuristic we use is that mostly a single line in the code base will keep producing the same string, at least for some time. So we cache only a single text rendering for each line that prints something to the screen. That means we don’t have to do any lookups in a cache data structure and we only use a guaranteed constant amount of memory for caching:
type
  CacheLine = object
    texture: TexturePtr
    w, h: cint

  TextCache = ref object
    text: string
    cache: array[2, CacheLine]

proc newTextCache: TextCache =
  new result
A CacheLine is what we store, a pointer to a texture as well as the texture’s
width and height. For our text rendering we need two of those as we render the
text twice to get the outline effect. The text is also stored in TextCache
to see if we already have the correct textures cached.
proc renderText(renderer: RendererPtr, font: FontPtr, text: string,
                x, y, outline: cint, color: Color): CacheLine =
  font.setFontOutline(outline)
  let surface = font.renderUtf8Blended(text.cstring, color)
  sdlFailIf surface.isNil: "Could not render text surface"

  discard surface.setSurfaceAlphaMod(color.a)

  result.w = surface.w
  result.h = surface.h
  result.texture = renderer.createTextureFromSurface(surface)
  sdlFailIf result.texture.isNil: "Could not create texture from rendered text"

  surface.freeSurface()
We manipulated renderText to return a CacheLine that we can use:
proc renderText(game: Game, text: string, x, y: cint,
                color: Color, tc: TextCache) =
  let passes = [(color: color(0, 0, 0, 64), outline: 2.cint),
                (color: color, outline: 0.cint)]

  if text != tc.text:
    for i in 0..1:
      tc.cache[i].texture.destroy()
      tc.cache[i] = game.renderer.renderText(
        game.font, text, x, y, passes[i].outline, passes[i].color)
    tc.text = text

  for i in 0..1:
    var source = rect(0, 0, tc.cache[i].w, tc.cache[i].h)
    var dest = rect(x - passes[i].outline, y - passes[i].outline,
                    tc.cache[i].w, tc.cache[i].h)
    game.renderer.copyEx(tc.cache[i].texture, source, dest,
                         angle = 0.0, center = nil)
In two passes the text is rendered, if the text is cached from the cache directly, otherwise the old cache entry is removed and replaced with the new textures.
Nim’s metaprogramming allows us to use this seamlessly with a small template. A few days ago I wrote an article about Metaprogramming in Nim if you want to learn more about the powerful side of Nim.
template renderTextCached(game: Game, text: string,
                          x, y: cint, color: Color) =
  block:
    var tc {.global.} = newTextCache()
    game.renderText(text, x, y, color, tc)

proc render(game: Game, tick: int) =
  # Draw over all drawings of the last frame with the default color
  game.renderer.clear()
  # Actual drawing here
  game.renderer.renderTee(game.player.texture,
    game.player.pos - game.camera)
  game.renderer.renderMap(game.map, game.camera)

  let time = game.player.time
  const white = color(255, 255, 255, 255)
  if time.begin >= 0:
    game.renderTextCached(formatTime(tick - time.begin),
      50, 100, white)
  elif time.finish >= 0:
    game.renderTextCached("Finished in: " &
      formatTimeExact(time.finish), 50, 100, white)
  if time.best >= 0:
    game.renderTextCached("Best time: " &
      formatTimeExact(time.best), 50, 150, white)

  # Show the result on screen
  game.renderer.present()
Now each of the three renderTextCached calls get its own TextCache
assigned, which is then used for the rest of the program execution. Note that
this caching scheme only works under the assumption that there are relatively
few separate lines of code that call renderTextCached and the ones that do
often render the same text multiple times in a row. Good enough for our use
case.
proc formatTime(ticks: int): string =
  let mins = (ticks div 50) div 60
  let secs = (ticks div 50) mod 60
  interp"${mins:02}:${secs:02}"

proc formatTimeExact(ticks: int): string =
  let cents = (ticks mod 50) * 2
  interp"${formatTime(ticks)}:${cents:02}"
We also reduced the exactness of the current time format because before it had to be recalculated every single frame. Now we’re back to using 4 % CPU and our final game looks like this:
Building
We can create a platformer.nimble file to tell
Nimble, Nim’s package manager, how to
build our package:
# Package

version       = "1.0"
author        = "Dennis Felsing"
description   = "An example platform game with SDL2"
license       = "MIT"

bin           = @["platformer"]

# Dependencies

requires "nim >= 0.10.0"
requires "sdl2 >= 1.1"
requires "strfmt >= 0.6"
requires "basic2d >= 0.1.0"

task tests, "Compile all tutorial steps":
  for i in 1..9:
    exec "nim c tutorial/platformer_part" & $i
All the intermediate code states from this article can be compiled with nimble
tests. We can test the build by running nimble build, which creates a
platformer binary that we can run. nimble install installs the same binary
so that it is available in ~/.nimble/bin.
But once we run this installed platformer binary we get an error:
Error: unhandled exception: Could not load image player.png, SDL error: Couldn't open player.png [SDLException]
Actually this makes sense, because we load the files at runtime from the current directory, which can now be any directory. We have two choices for how to solve this:
- Read in all files at compile time and get a binary that depends on no assets
Doing this is pretty simple in Nim as the compiler supports reading arbitrary files at compile time withstaticRead:
import streams

template staticReadRW(filename: string): ptr RWops =
  const file = staticRead(filename)
  rwFromConstMem(file.cstring, file.len)

template staticReadStream(filename: string): string =
  const file = staticRead(filename)
  newStringStream(file)

proc newGame(renderer: RendererPtr): Game =
  new result
  result.renderer = renderer

  result.font = openFontRW(
    staticReadRW("DejaVuSans.ttf"), freesrc = 1, 28)
  sdlFailIf result.font.isNil: "Failed to load font"

  result.player = newPlayer(renderer.loadTexture_RW(
    staticReadRW("player.png"), freesrc = 1))
  result.map = newMap(renderer.loadTexture_RW(
    staticReadRW("grass.png"), freesrc = 1),
    staticReadStream("default.map"))
- Define a directory where we store our data assets to load them at runtime. This enables the player to switch them out for custom ones without the need to recompile the binary. And as we’ve seen with the DDNet Skin Database this might be a useful feature. We find the data directory by looking where in the file system our binary is. Let’s implement this and make the old embedded compile time assets optional:
import os, streams

const dataDir = "data"

when defined(embedData):
  template readRW(filename: string): ptr RWops =
    const file = staticRead(dataDir / filename)
    rwFromConstMem(file.cstring, file.len)

  template readStream(filename: string): Stream =
    const file = staticRead(dataDir / filename)
    newStringStream(file)
else:
  let fullDataDir = getAppDir() / dataDir

  template readRW(filename: string): ptr RWops =
    var rw = rwFromFile(cstring(fullDataDir / filename), "r")
    sdlFailIf rw.isNil: "Cannot create RWops from file"
    rw

  template readStream(filename: string): Stream =
    var stream = newFileStream(fullDataDir / filename)
    if stream.isNil: raise ValueError.newException(
      "Cannot open file stream:" & fullDataDir / filename)
    stream

proc newGame(renderer: RendererPtr): Game =
  new result
  result.renderer = renderer

  result.font = openFontRW(
    readRW("DejaVuSans.ttf"), freesrc = 1, 28)
  sdlFailIf result.font.isNil: "Failed to load font"

  result.player = newPlayer(renderer.loadTexture_RW(
    readRW("player.png"), freesrc = 1))
  result.map = newMap(renderer.loadTexture_RW(
    readRW("grass.png"), freesrc = 1),
    readStream("default.map"))
This also requires us to change newMap to accept a Stream instead of a filename:
proc newMap(texture: TexturePtr, map: Stream): Map =
  new result
  result.texture = texture
  result.tiles = @[]

  var line = ""
  while map.readLine(line):
    ...
When compiling you can set -d:embedData like this:
$ nim -d:release c platformer
$ ls -lha platformer
-rwxr-xr-x 1 deen deen 129K Jun 13 14:54 platformer*
$ nim -d:release -d:embedData c platformer
$ ls -lha platformer
-rwxr-xr-x 1 deen deen 888K Jun 13 14:55 platformer*
You can find our final platform game code in the repository.
Now we can submit the repository to the Nimble
packages as a pull request and soon all
Nim developers can install the package right from their terminal with a nimble
install platformer and play by just running platformer.
A circle.yml file defines how to run and compile our repository and is used to make sure it keeps building fine whenever changes are made.
Binary Distribution
But Nim developers are probably not the main target group of our game, so ideally we we also want to be able to build binaries for a few common platforms, Linux x86, x86-64 and Windows x86, x86-64 for us. Building for Mac OS X is a bit more involved, but you can check out how DDNet does it.
Of course we could just set up a VM for each system that we want to build for and use the instructions from the start of this article. But that’s tedious and we want the convenience of building on a single machine.
Linux
Note that I’m on Arch Linux, but this should be possible in an analogous way on other Linux distributions:
Building a portable binary for Linux is a pain because of glibc. When you compile on a system with a newer glibc version it might not run on a system with an older one. A common solution is to use a build system with an old Linux install. Alternatively an old Debian chroot can be created with debootstrap. There is also Linux Standard Base which aims to solve this problem, but I haven’t used yet.
A more hacky solution is to create the binary on the new system and check what
symbols exactly are linked against the newer glibc version. In our case I want
everything to use GLIBC_2.2.5, so I check for anything else:
objdump -T platformer | grep GLIBC | grep -v 2.2.5
0000000000000000      DF *UND*	0000000000000000  GLIBC_2.14  memcpy
Okay, only memcpy is the problem. We can force the linker to use an old version
of memcpy and another common problem, realpath, like this in C code with
inline assembler:
__asm__(".symver memcpy,memcpy@GLIBC_2.2.5");
__asm__(".symver realpath,realpath@GLIBC_2.2.5");
But this would require for us to insert this into every C file that we
generate. Or we abuse the nimbase.h file and insert it there and compile
with:
$ head -n2 glibc-hack/nimbase.h
__asm__(".symver memcpy,memcpy@GLIBC_2.2.5");
__asm__(".symver realpath,realpath@GLIBC_2.2.5");
$ nim -d:release --passC:-Iglibc-hack c platformer
$ objdump -T platformer | grep memcpy
0000000000000000      DF *UND* 0000000000000000  GLIBC_2.2.5 memcpy
$ objdump -T platformer|grep GLIBC|grep -v 2.2.5
Now our binary works on Linux versions using glibc 2.2.5 or newer. Note that the user still needs SDL2, SDL_image2 and SDL_ttf2 installed.
When you’re linking dynamically and want to distribute shared libraries with
your binary you can compile with nim --passC:-Wl,-rpath,. c platformer and
put the shared libraries into the same directory as the binary.
At least building for x86 is easy on Linux as long as you’re on x86-64 and have gcc-multilib installed:
$ yaourt -S lib32-sdl2 lib32-sdl2_image lib32-sdl2_ttf
$ nim --cpu:i386 --passC:-m32 --passL:-m32 -d:release c platformer
Windows
Surprisingly it is much easier to build portable binaries for Windows, even from Linux:
$ pacman -S mingw-w64-gcc
$ nim --os:windows --cpu:amd64 --gcc.exe:x86_64-w64-mingw32-gcc --gcc.linkerexe:x86_64-w64-mingw32-gcc -d:release c platformer
$ nim --os:windows --cpu:i386 --gcc.exe:i686-w64-mingw32-gcc --gcc.linkerexe:i686-w64-mingw32-gcc -d:release c platformer
SDL libraries for Windows can be downloaded from the SDL2 website (image, ttf).
Stripping the binaries of symbols with strip -s platformer is a good idea if
you want to save some space and don’t care about debugging your binary.
Automated Build Script
With all this information we can now write a fully automated release build script, written in Nim as well:
import os, strfmt

const
  app = "platformer"
  version = "1.0"

  builds = [
    (name: "linux_x86", os: "linux", cpu: "i386",
     args: "--passC:-m32 --passL:-m32"),
    (name: "linux_x86_64", os: "linux", cpu: "amd64",
     args: "--passC:-Iglibc-hack"),
    (name: "win32", os: "windows", cpu: "i386",
     args: "--gcc.exe:i686-w64-mingw32-gcc --gcc.linkerexe:i686-w64-mingw32-gcc"),
    (name: "win64", os: "windows", cpu: "amd64",
     args: "--gcc.exe:x86_64-w64-mingw32-gcc --gcc.linkerexe:x86_64-w64-mingw32-gcc"),
  ]

removeDir "builds"

for name, os, cpu, args in builds.items:
  let
    dirName = app & "_" & version & "_" & name
    dir = "builds" / dirName
    exeExt = if os == "windows": ".exe" else: ""
    bin = dir / app & exeExt

  createDir dir
  if execShellCmd(interp"nim --cpu:${cpu} --os:${os} ${args} -d:release -o:${bin} c ${app}") != 0: quit 1
  if execShellCmd(interp"strip -s ${bin}") != 0: quit 1
  copyDir("data", dir / "data")
  if os == "windows": copyDir("libs" / name, dir)
  setCurrentDir "builds"
  if os == "windows":
    if execShellCmd(interp"zip -9r ${dirName}.zip ${dirName}") != 0: quit 1
  else:
    if execShellCmd(interp"tar cfz ${dirName}.tar.gz ${dirName}") != 0: quit 1
  setCurrentDir ".."
Linux users have to install sdl2, sdl2_image, sdl2_ttf using their package
manager. Windows users get them bundled. Our build script creates this
directory structure when we run it with nim -r c release:
.
├── platformer_1.0_linux_x86
│   ├── data
│   │   ├── default.map
│   │   ├── DejaVuSans.ttf
│   │   ├── grass.png
│   │   └── player.png
│   └── platformer
├── platformer_1.0_linux_x86.tar.gz
├── platformer_1.0_linux_x86_64
│   ├── data
│   │   ├── default.map
│   │   ├── DejaVuSans.ttf
│   │   ├── grass.png
│   │   └── player.png
│   └── platformer
├── platformer_1.0_linux_x86_64.tar.gz
├── platformer_1.0_win32
│   ├── data
│   │   ├── default.map
│   │   ├── DejaVuSans.ttf
│   │   ├── grass.png
│   │   └── player.png
│   ├── libfreetype-6.dll
│   ├── libpng16-16.dll
│   ├── platformer.exe
│   ├── SDL2.dll
│   ├── SDL2_image.dll
│   ├── SDL2_ttf.dll
│   └── zlib1.dll
├── platformer_1.0_win32.zip
├── platformer_1.0_win64
│   ├── data
│   │   ├── default.map
│   │   ├── DejaVuSans.ttf
│   │   ├── grass.png
│   │   └── player.png
│   ├── libfreetype-6.dll
│   ├── libpng16-16.dll
│   ├── platformer.exe
│   ├── SDL2.dll
│   ├── SDL2_image.dll
│   ├── SDL2_ttf.dll
│   └── zlib1.dll
└── platformer_1.0_win64.zip
Resulting downloads here: Win64, Win32, Linux x86_64, Linux x86
Final Words
Somehow my articles are getting longer and this journey towards writing a simple platform game took a few more explanations than expected. I hope this article wasn’t too long and was instructive and helpful to get an understanding of how to write platform games in Nim with SDL2.
All the material for this article is available in the repository on GitHub. Because I changed around things late into the article I might have made a mistake or missed something. If you find a bug or have a comment you can drop me an email at [email protected].
Discussions on r/programming and Hacker News.