macOS Setup after 15 Years of Linux
2021-12-26 · ProgrammingAbout 3 years ago I wrote about my Linux Desktop Setup and having used pretty much the same software setup for 10-15 years. My setup used to be heavily keyboard based. Now for work I am for the first time using a macOS-based Macbook Pro with an M1 Pro CPU. I spent the last 3 weeks using it as a daily driver, tweaking it here and there. Here are my experiences.
 Hardware-wise the machine is great. With the 10 core ARM64 CPU I get about 2-3 times the CPU performance of my desktop system with an Intel i7 6700k. In DDNet I can reach 1800 FPS which is clearly more than enough and about 10 times the FPS I have with the 6700k’s iGPU. I haven’t heard the fan turn on at all yet, so either my workloads, and even my compilations, are too light-weight, or the fan is pretty quiet. The integrated 120 Hz screen is far better than anything I’ve had before, with clearer colors and smoother motion.
Installing Software
macOS’s AppStore doesn’t seem to have most of the relevant applications for me. Homebrew seems to be the most popular third-party package manager for macOS, so I chose that, hoping that it would support most programs I want to use. Command line applications can be installed with brew install, while graphical applications that you want acccessible in the regular Applications directory need a brew install --cask.
For some applications like mpv this can be a bit confusing since there is both a command-line Formulae and a GUI Cask available for it. The Cask doesn’t support arm64 natively yet, since the maintainer of it doesn’t have an M1 Mac and mpv doesn’t provide official binaries. So here I noticed a major difference in how Homebrew seems to work compared to Arch Linux for example. On Arch Linux applications are built from source code centrally instead of relying on binaries from a vendor.
Luckily it was easy enough to build a DMG of mpv myself, which I then installed by dragging it into the Applications folder:
git clone https://github.com/mpv-player/mpv
cd mpv
git clean -f -d
git pull origin master
./bootstrap.py
export PKG_CONFIG_PATH="$(brew --prefix luajit-openresty)/lib/pkgconfig"
./waf configure --lua=luajit
./waf build
TOOLS/osxbundle.py -s build/mpv
With the openwith utility I can set mpv as the default application for video file types:
openwith io.mpv mkv mov mp4 aviCompared to the x86-64 binary executed with the Rosetta2 translator this uses half the CPU. Surprisingly playing YouTube videos on Firefox directly is using even less CPU. My current assumption is that the videotoolbox hardware decoding support doesn’t support the same codecs in mpv yet as it does in Firefox.
Update: By building my own FFmpeg version VP9 videotoolbox support is available, it will probably be in the next FFmpeg release.
Command line software
My regular command line software like vim, mutt, remind, htop, unison, yt-dlp, newsboat, ssh, rsync, rrb work just fine and were easy to install with a brew install command. So most of my setup can stay the same and I can still have the same setup whether I run my applications in a local terminal or on my home server via SSH, for example from my phone or a remote machine.
Window management
I started missing xmonad, my tiling window manager of choice immediately. So my first idea was to use Amethyst instead, which provides some of the features of xmonad, but without the customizability of writing your own config in Haskell.
It seemed to work ok, but was feeling a bit more awkward to use compared to on Linux. So I decided to use the native macOS window management instead and try to get used to it instead of actively fighting against it. At the moment I’m using the integrated 16” screen and an external 24” monitor. Most applications I use “zoomed in”, which means they take all the space, but are not actually fullscreen, so you still see the dock and window’s title bar. There appears to be no system shortcut to zoom a window, so I have to double click the title bar.
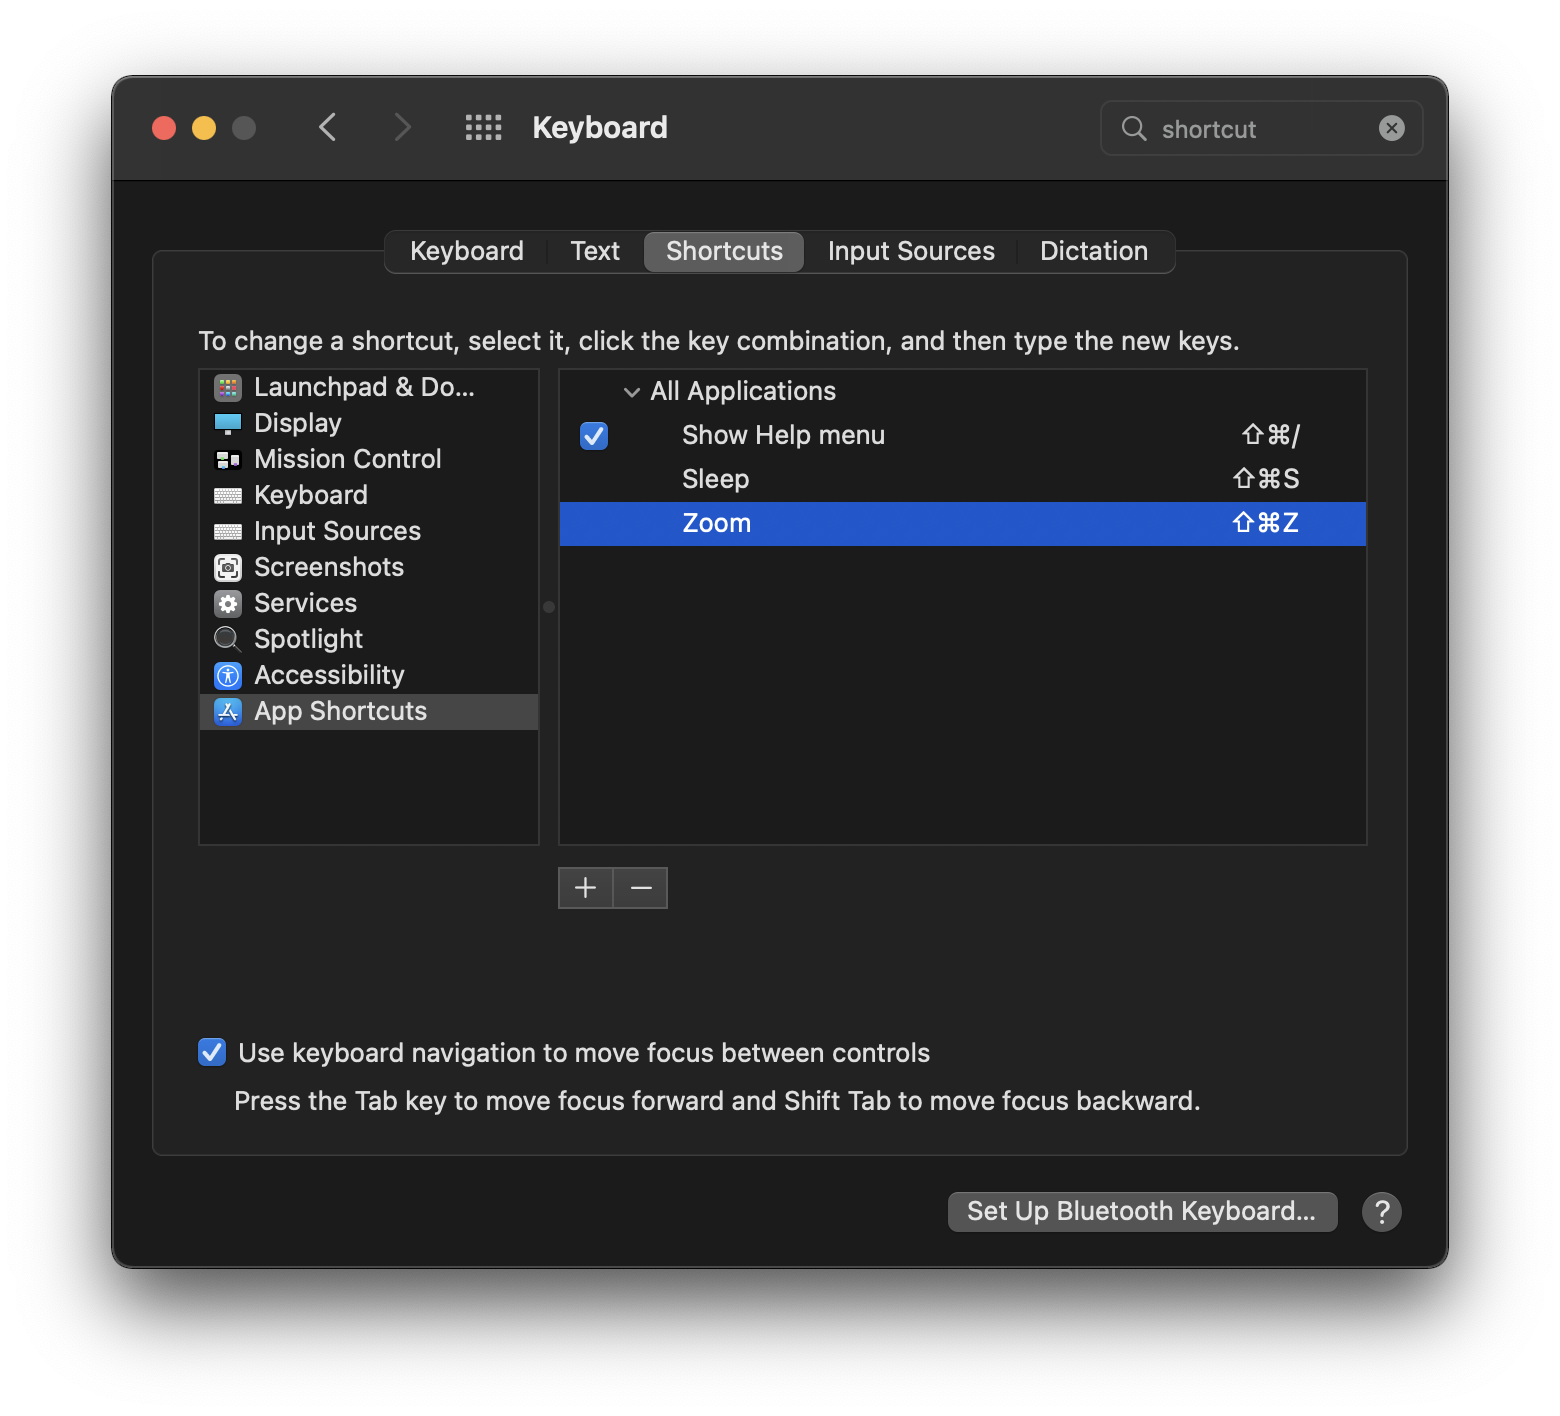
Update: I found out that you can set a shortcut for “Zoom” by adding it in the System Preferences. This apparently works for any term that is available in the program’s title bar:
Update 2: Several people suggested Rectangle for moving and resizing windows, which seems to work well, especially with my large 40” screen.
Terminal
iTerm2 is the terminal emulator I chose to use. It has lots of features and so far seems to work fine. Each window and tab gets a dedicated shortcut, and it allows splitting the tab horizontally and vertically, so I can have multiple terminals open at once and jump between them reasonably without needing to use the mouse.
I mostly have one iTerm window open for most command line applications. If I need something quickly, I bound command-return to open a hotkey terminal window. Opening a new iTerm window from outside the application was slightly more challenging. The easiest way is pressing command-n from inside iTerm. From outside just using F4 and writing iTerm will do nothing when another iTerm window is already open. I had to set up an AppleScript workflow in Automator:
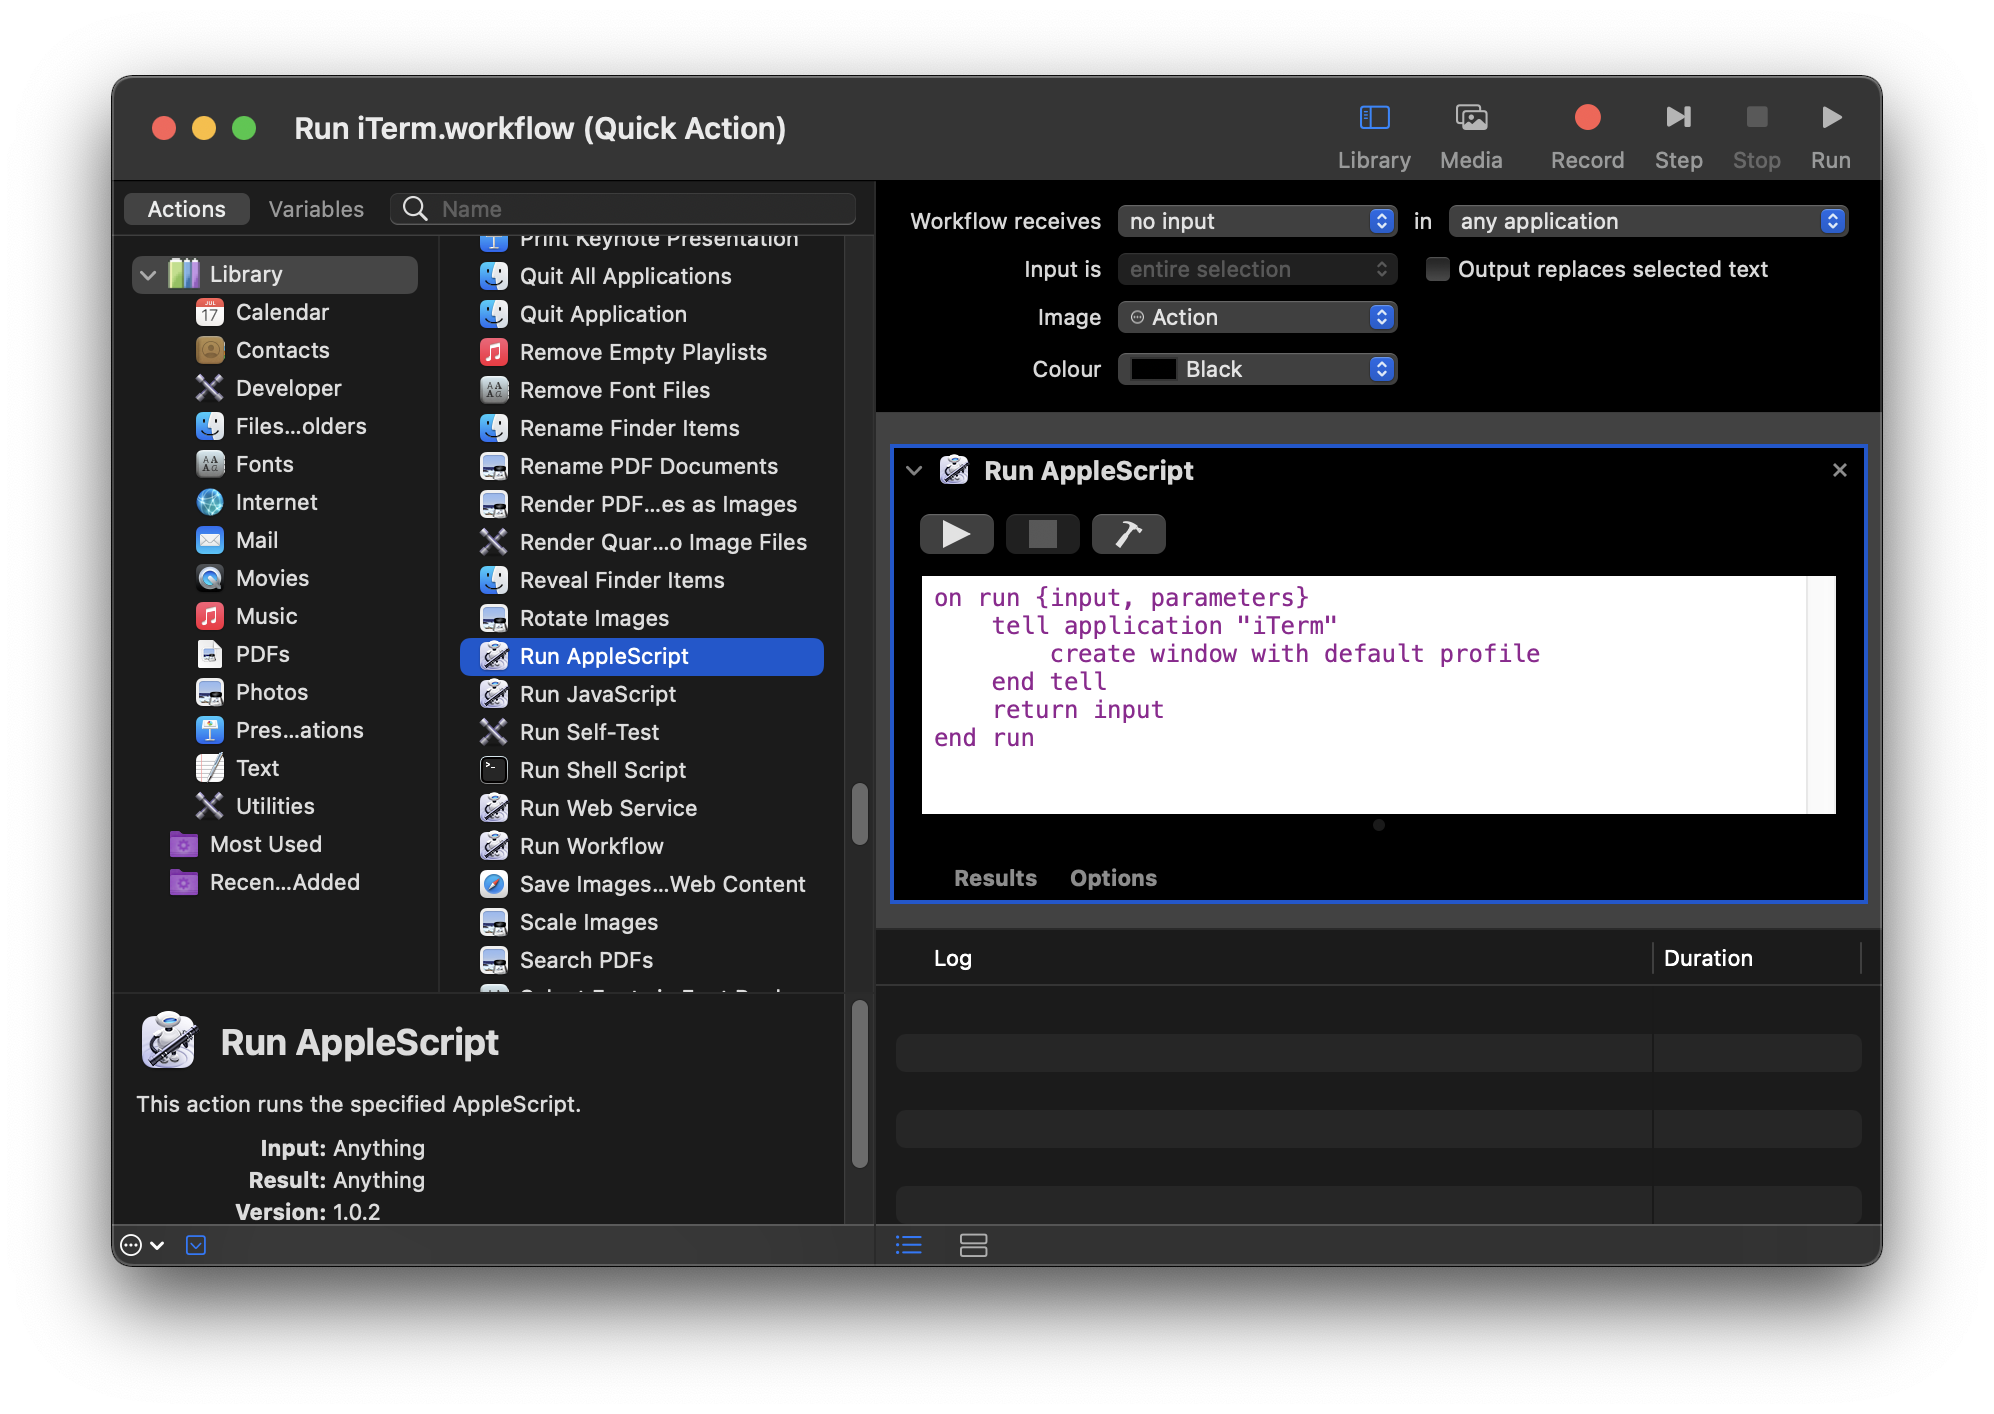
on run {input, parameters}
    tell application "iTerm"
        create window with default profile
    end tell
    return input
end run
Then it can be set as a global shortcut in Preferences:
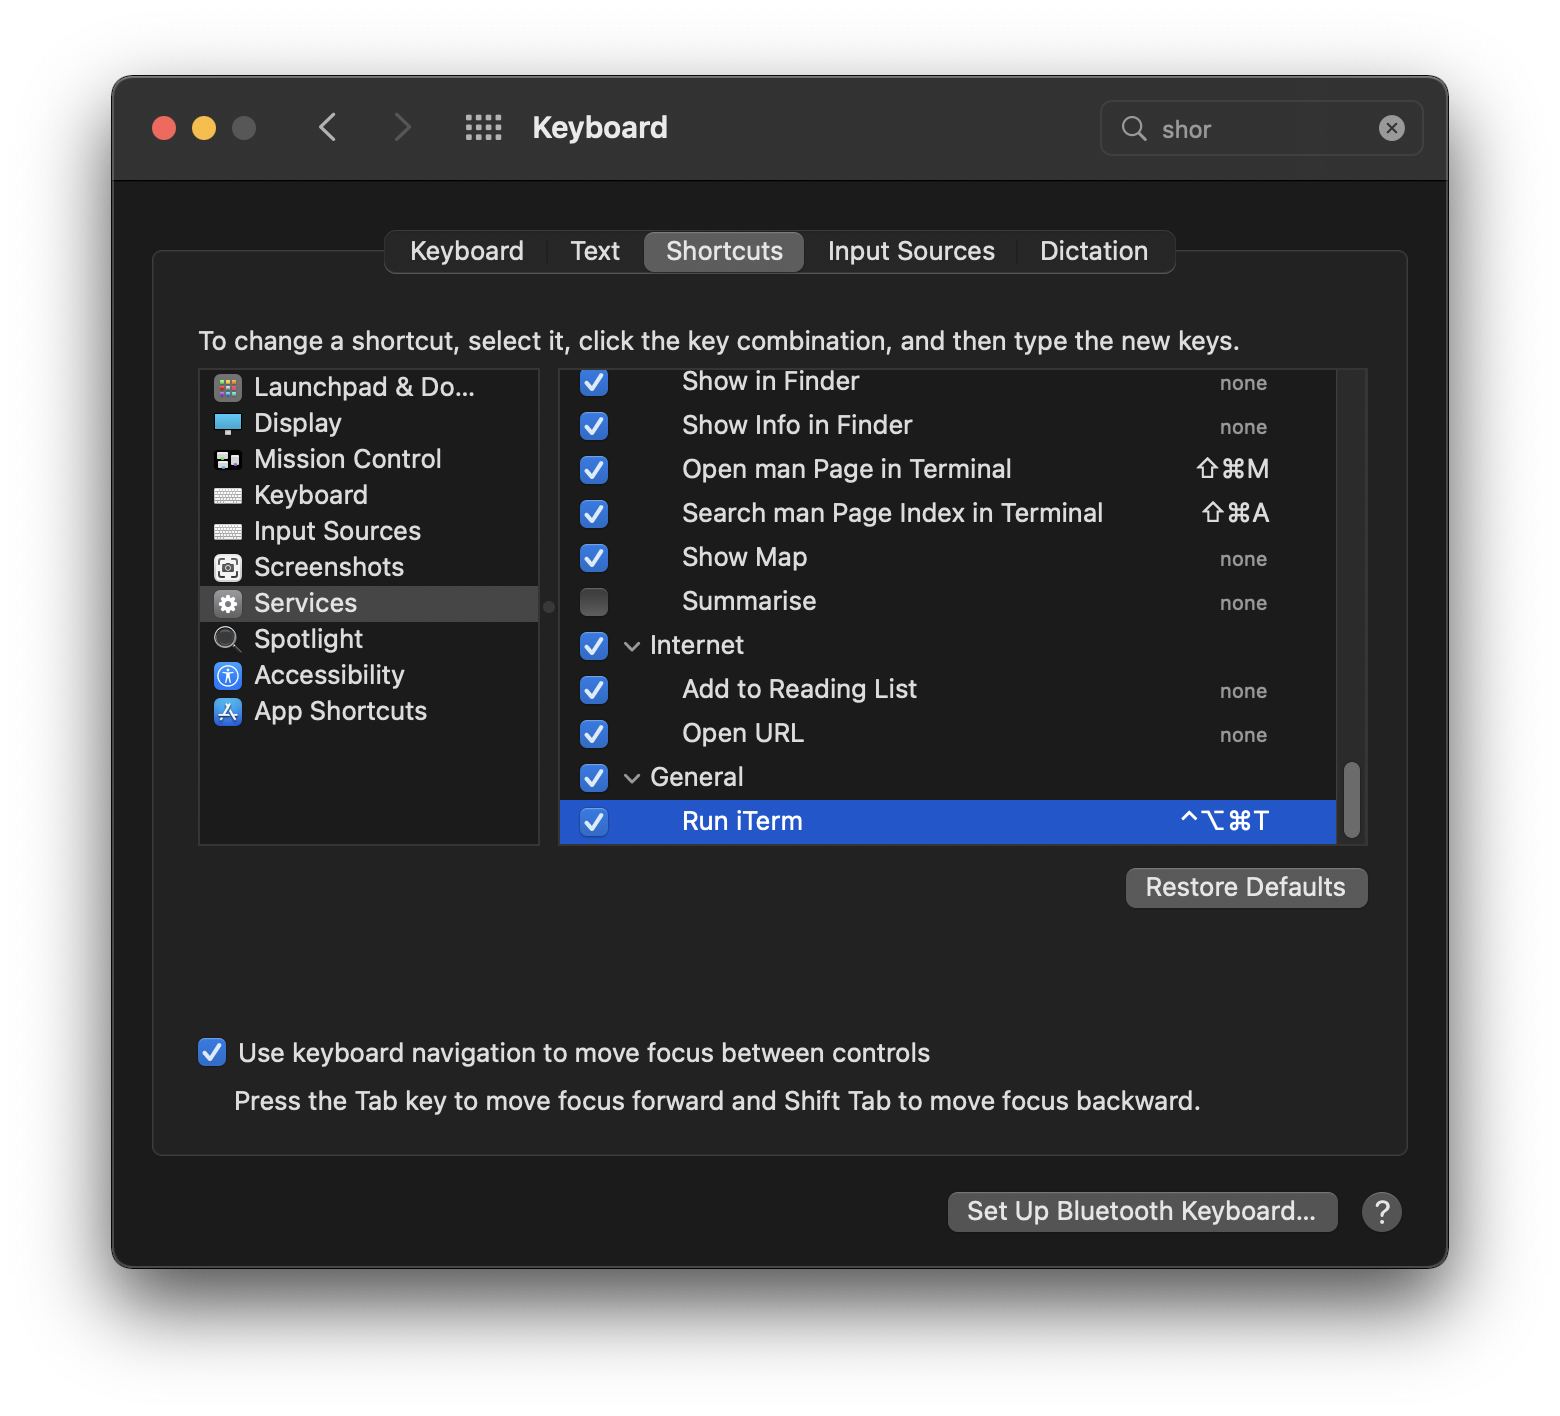
There seems to be considerable overhead to using Automator for shortcuts though, the terminal window takes nearly a second to appear. Luckily I rarely needed a new terminal, since the windows persist after a reboot and I mostly just have to set them up once, and the hotkey terminal is fine for quick tasks like checking mail.
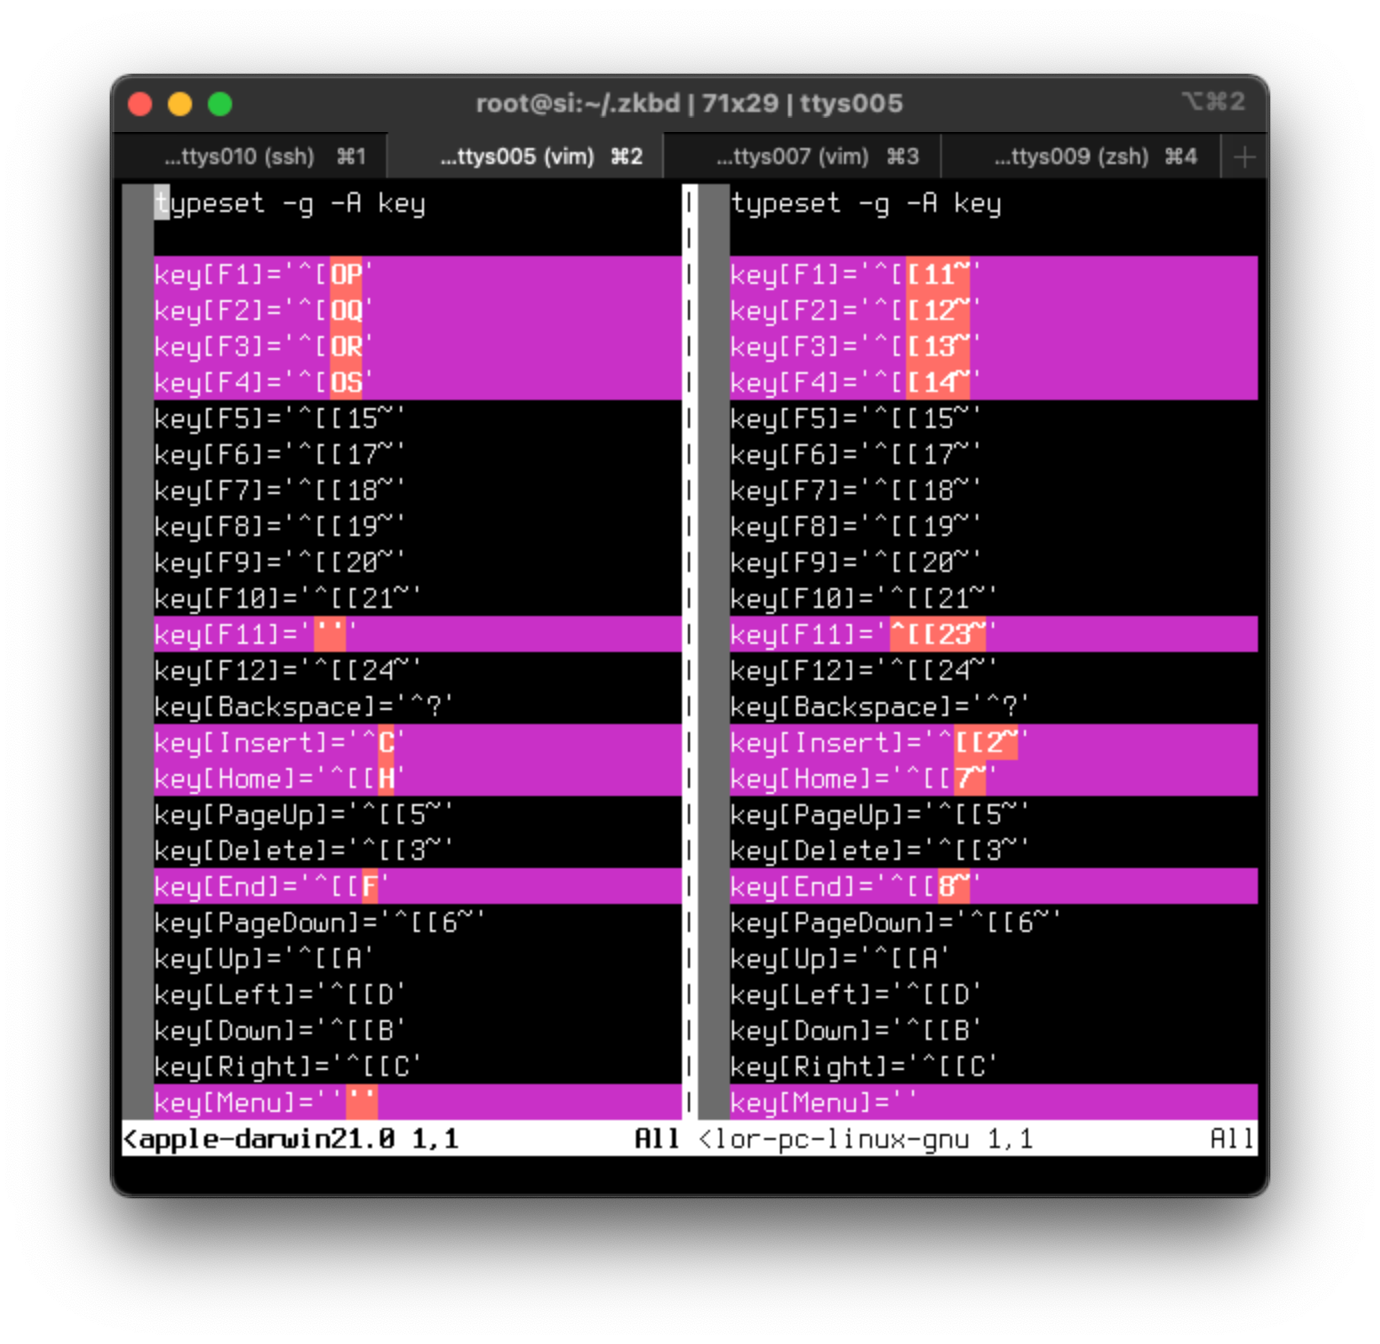
One issue I still have is that iTerm seems to send the home/end/insert keys differently from urxvt, my terminal emulator on Linux. But since both are identifying as TERM=xterm-256color to support full colors, I can’t tell them apart using zkbd when SSHing into a remote system. Not sure yet how to solve this cleanly. Here are the differences:
My favorite fixed-width bitmap font Terminus works fine with anti-aliasing disabled in iTerm with the font-terminus formula installed via:
brew tap homebrew/cask-fonts
brew install font-terminus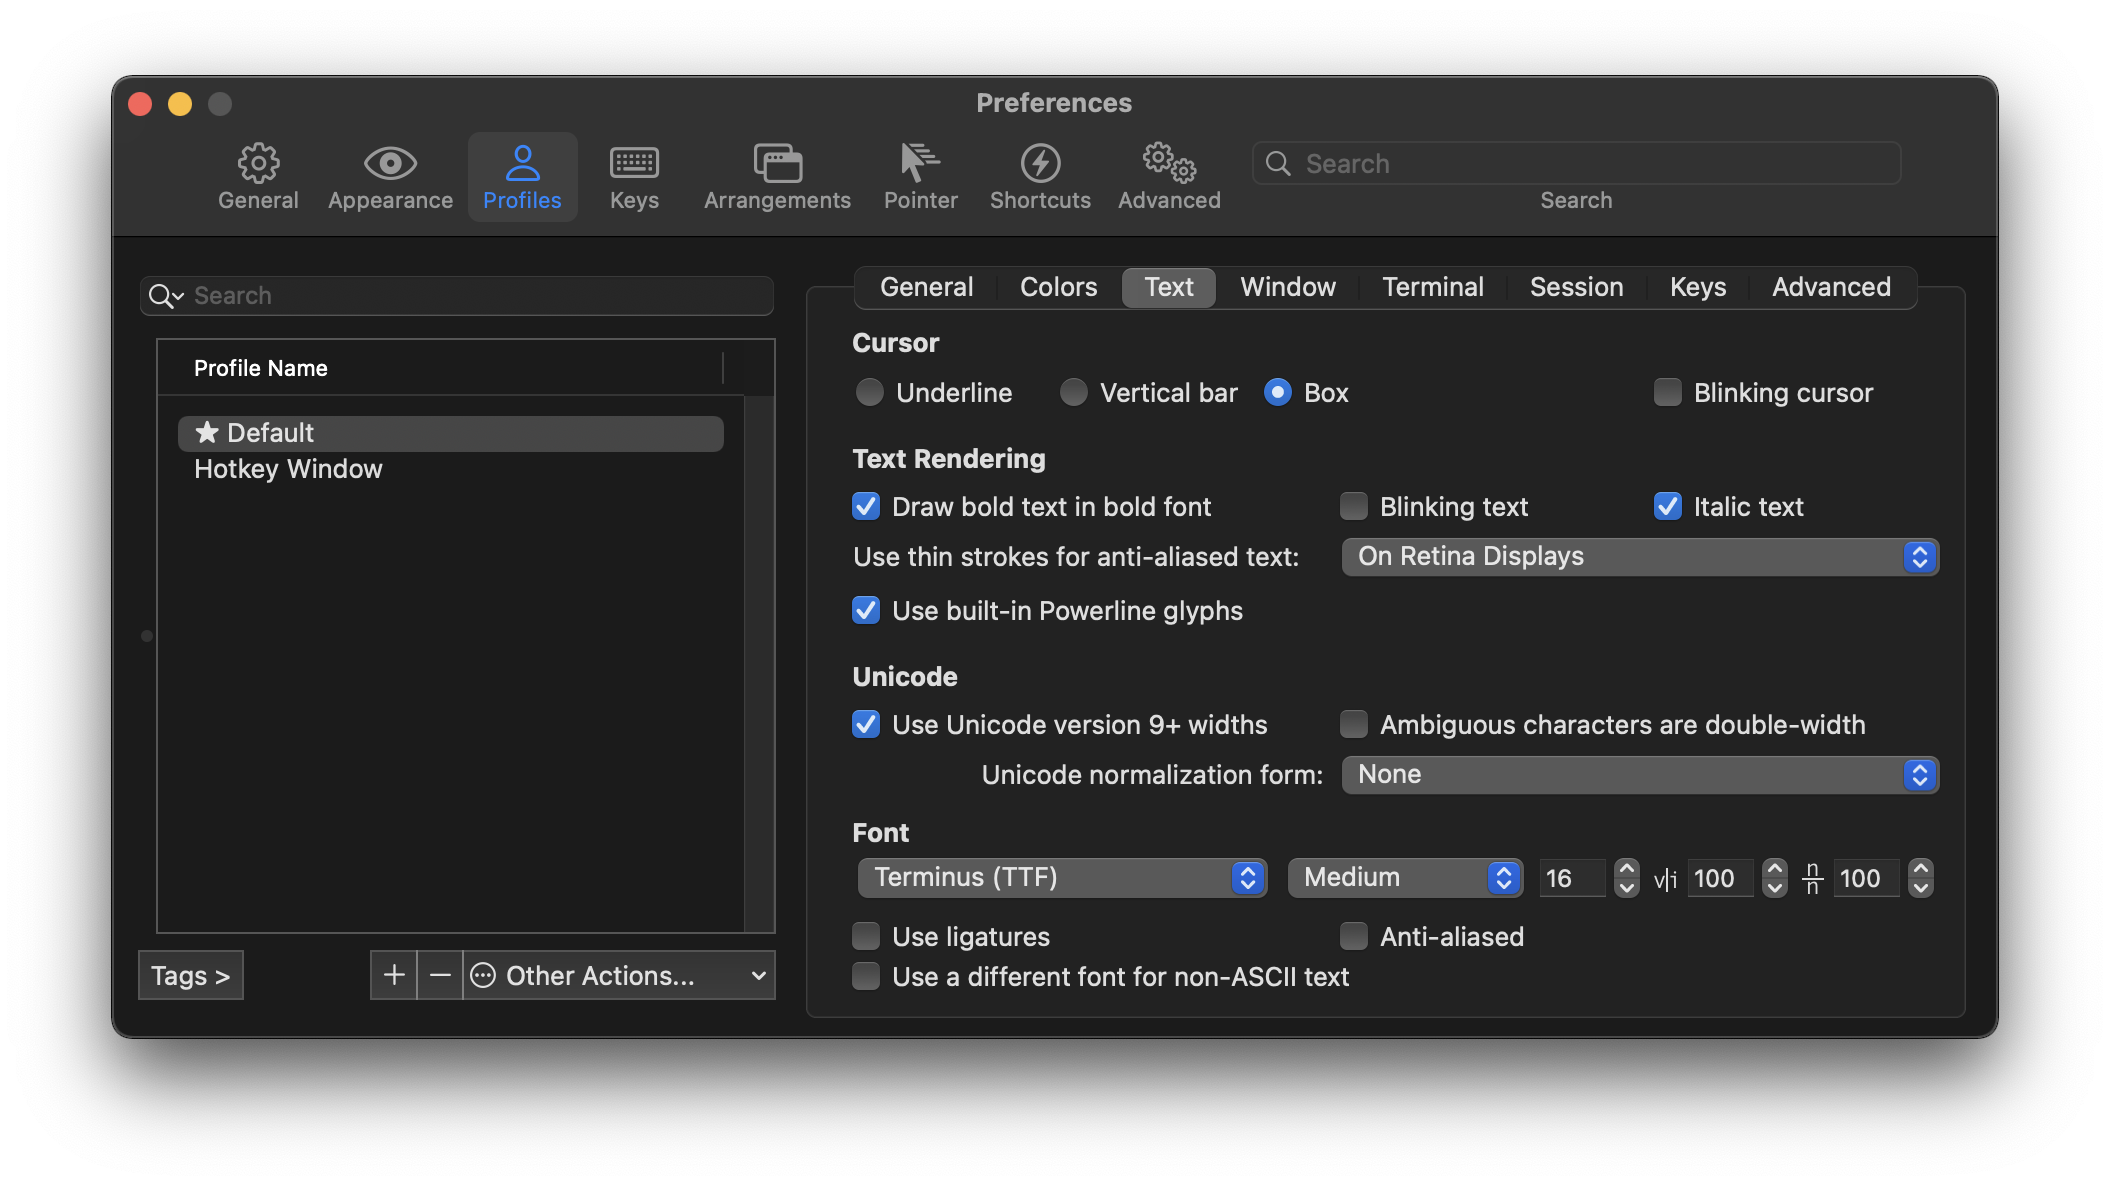
Unfortunately the font only works at specific sizes, I haven’t figured out yet how to exclude them when changing the font-sizes on-the-fly using command-+ and command–. But I rarely need to change font sizes anyway.
I still use my tach script so I don’t use my terminals when I accidentally close the iTerm windows:
tach is a script that provides automatic detaching and reattaching of terminals using dtach
This also allows me to move a running terminal session from one place to another using only the keyboard by detaching it using command-w and opening a new terminal anywhere I want, which will contain the previously detached session.
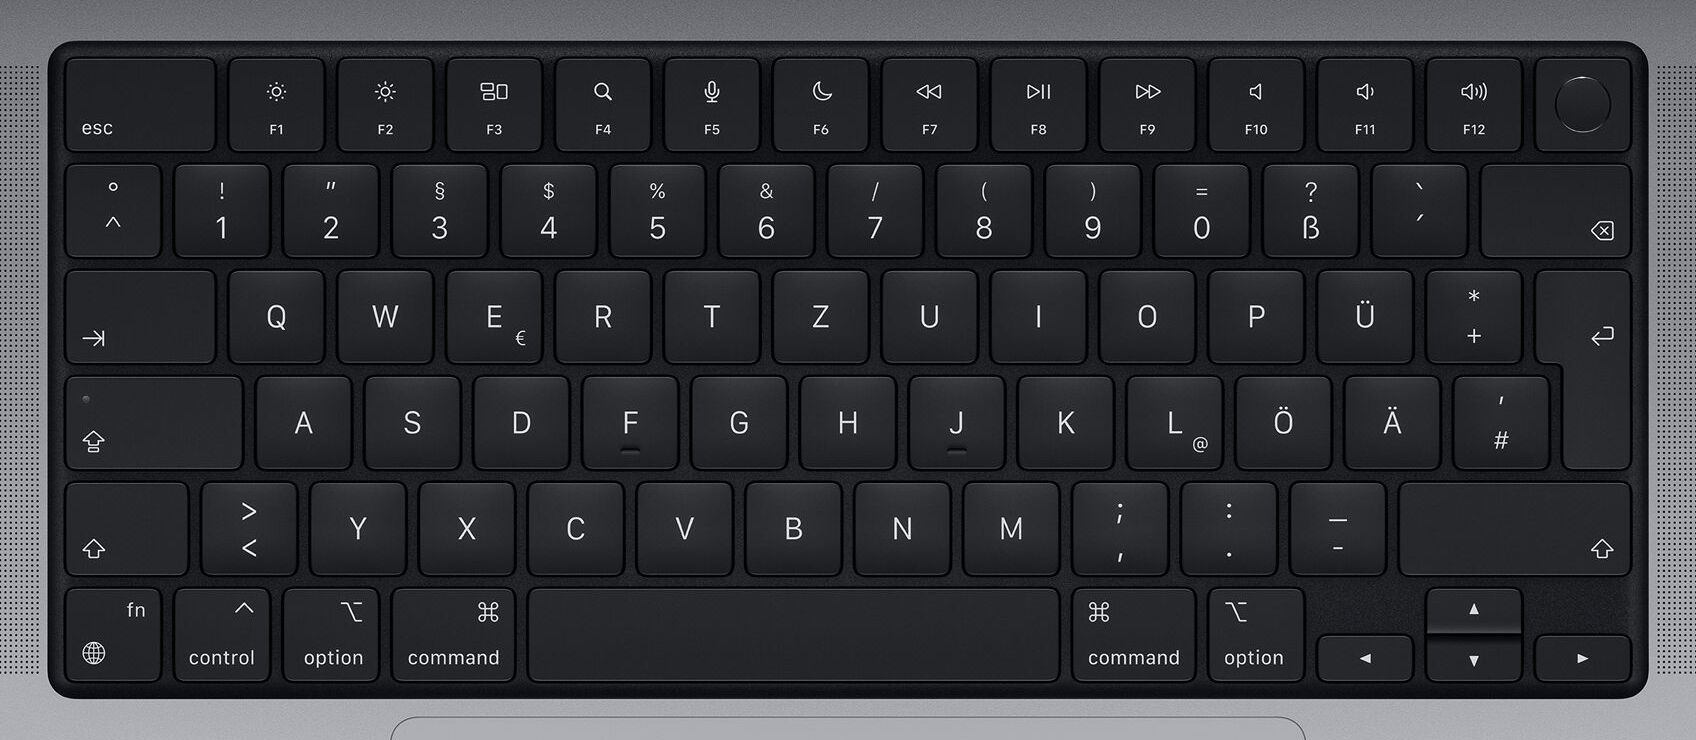
Keyboard layout
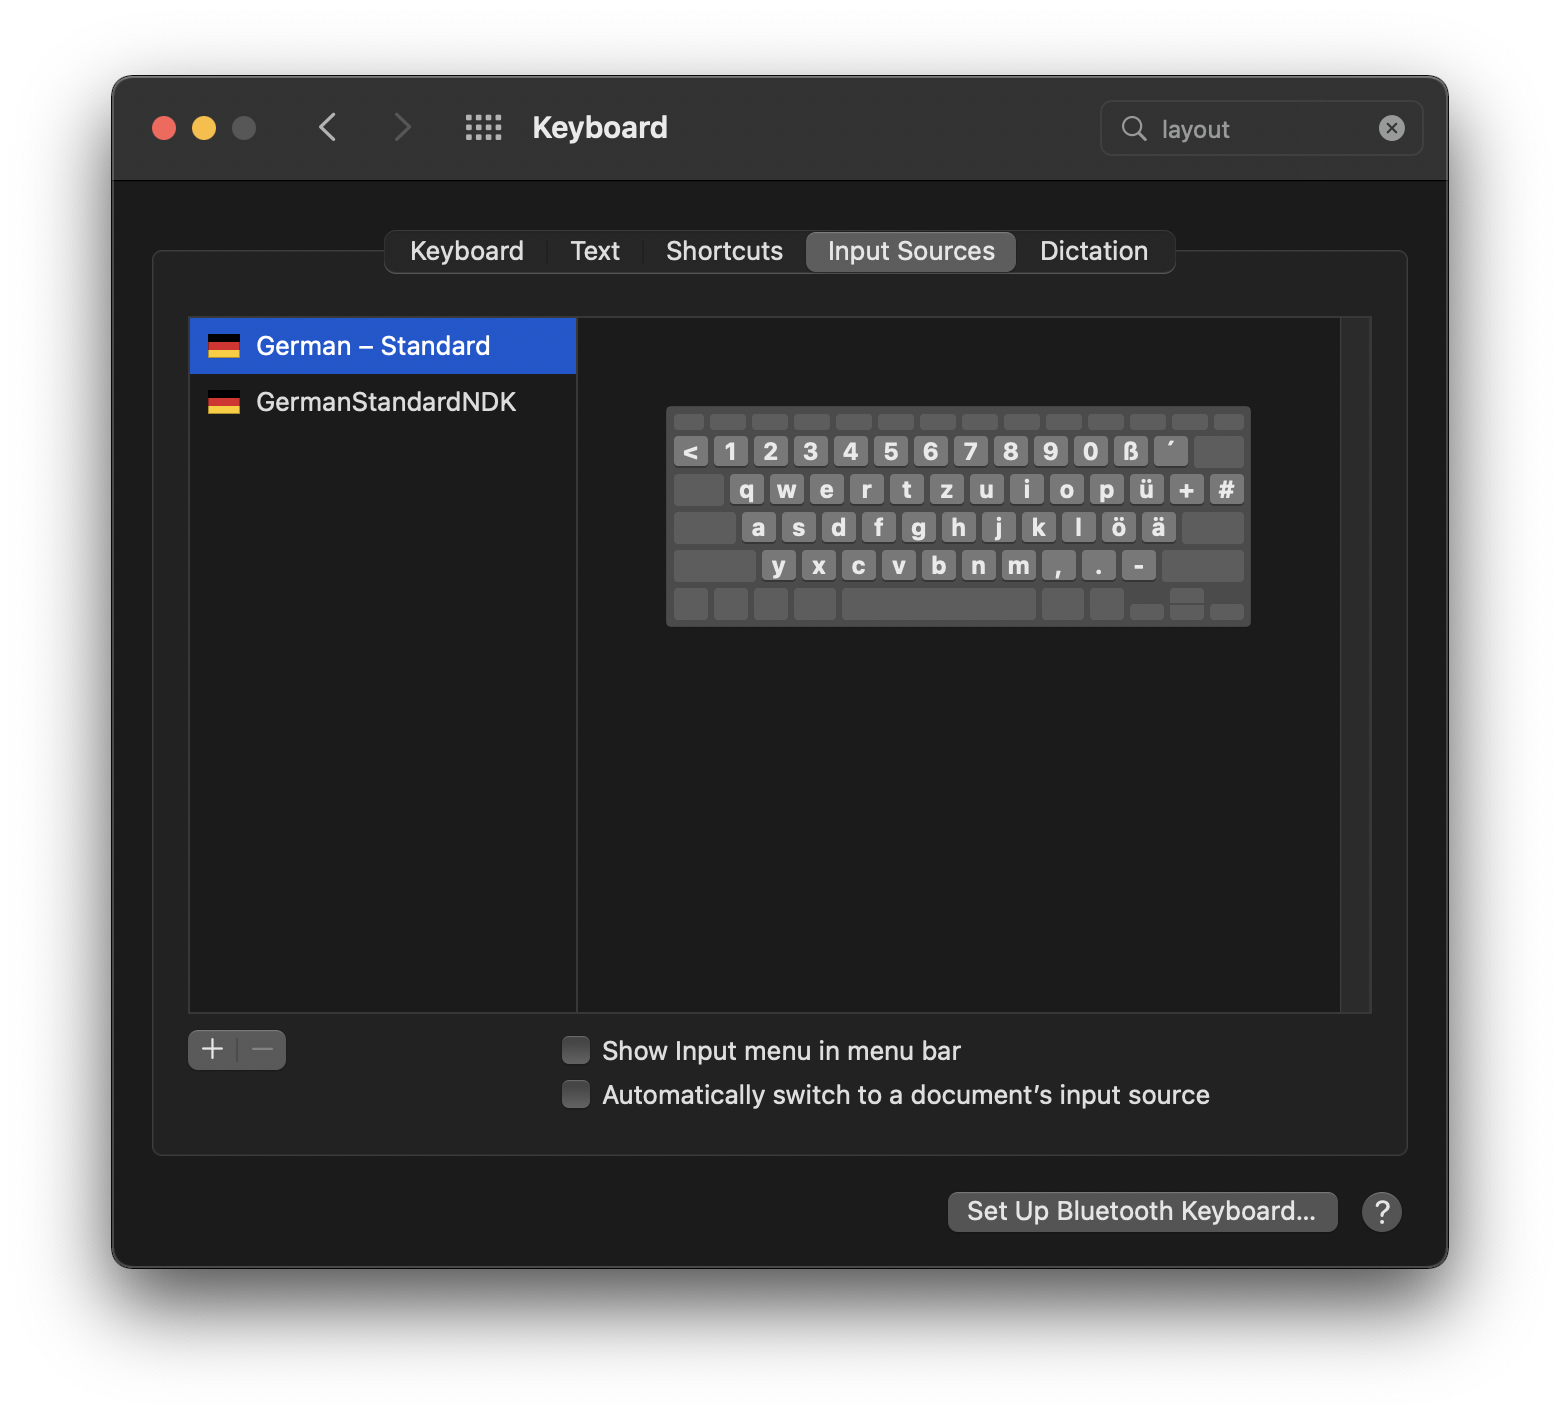
I’ve been using a German keyboard layout for a while, since a short excursion to Dvorak. My first problem was that macOS’s German keyboard layout uses option-l instead of the option-q I was used to for typing the @ character. Luckily this is easily remedied by switching from the “German” keyboard layout to “German - Standard”.
Unfortunately this is still not quite the same as on a German standard PC keyboard, where the altgr key sits just right of the spacebar, while on a Mac the option key is seperated from the spacebar by the command key. The problem is exacerbated by command-q being the default keyboard shortcut to close an application on macOS. So I ended up closing my currently open application every time I tried entering an @, for example when writing my own email address trying to log into a website.
That’s not ideal, so I thought the easiest solution would be switching the command and option modifier keys in the System Preferences:
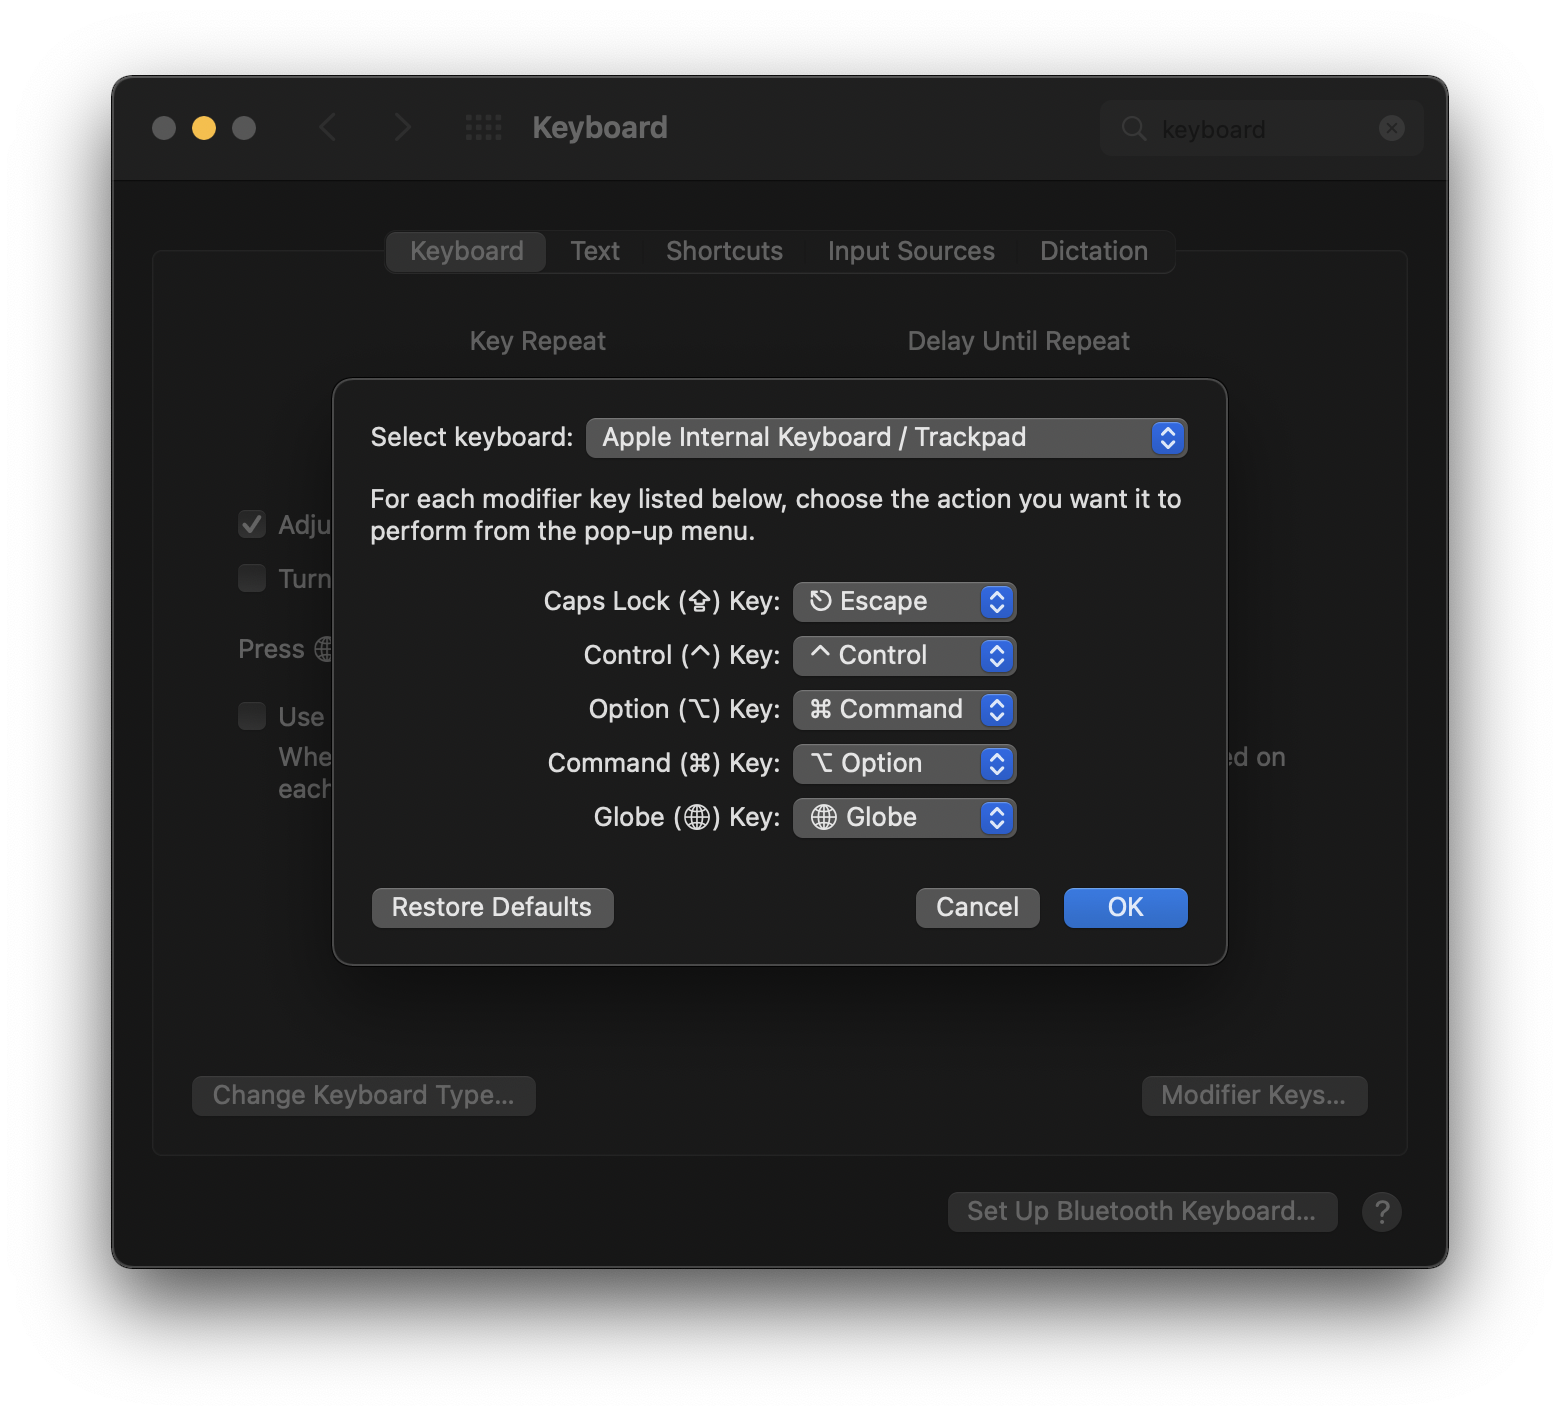
This brought me one step forward, two steps back: Now the default system key binds are more akward, since this also switches the left option and command keys. Apple uses command-f (search), command-c (copy), command-v (paste) etc. and all of these became a bit more awkward to press with the preferences-based modifier key switch.
Additionally I noticed that the left option key was actually switched with the right command key and the left command key with the right option key, which is also not ideal when you have programs that only listen to one of the modifiers. At least I got my first macOS bug report out of this.
A better solution for me was using Karabiner-Elements to only swap the right command and option keys:
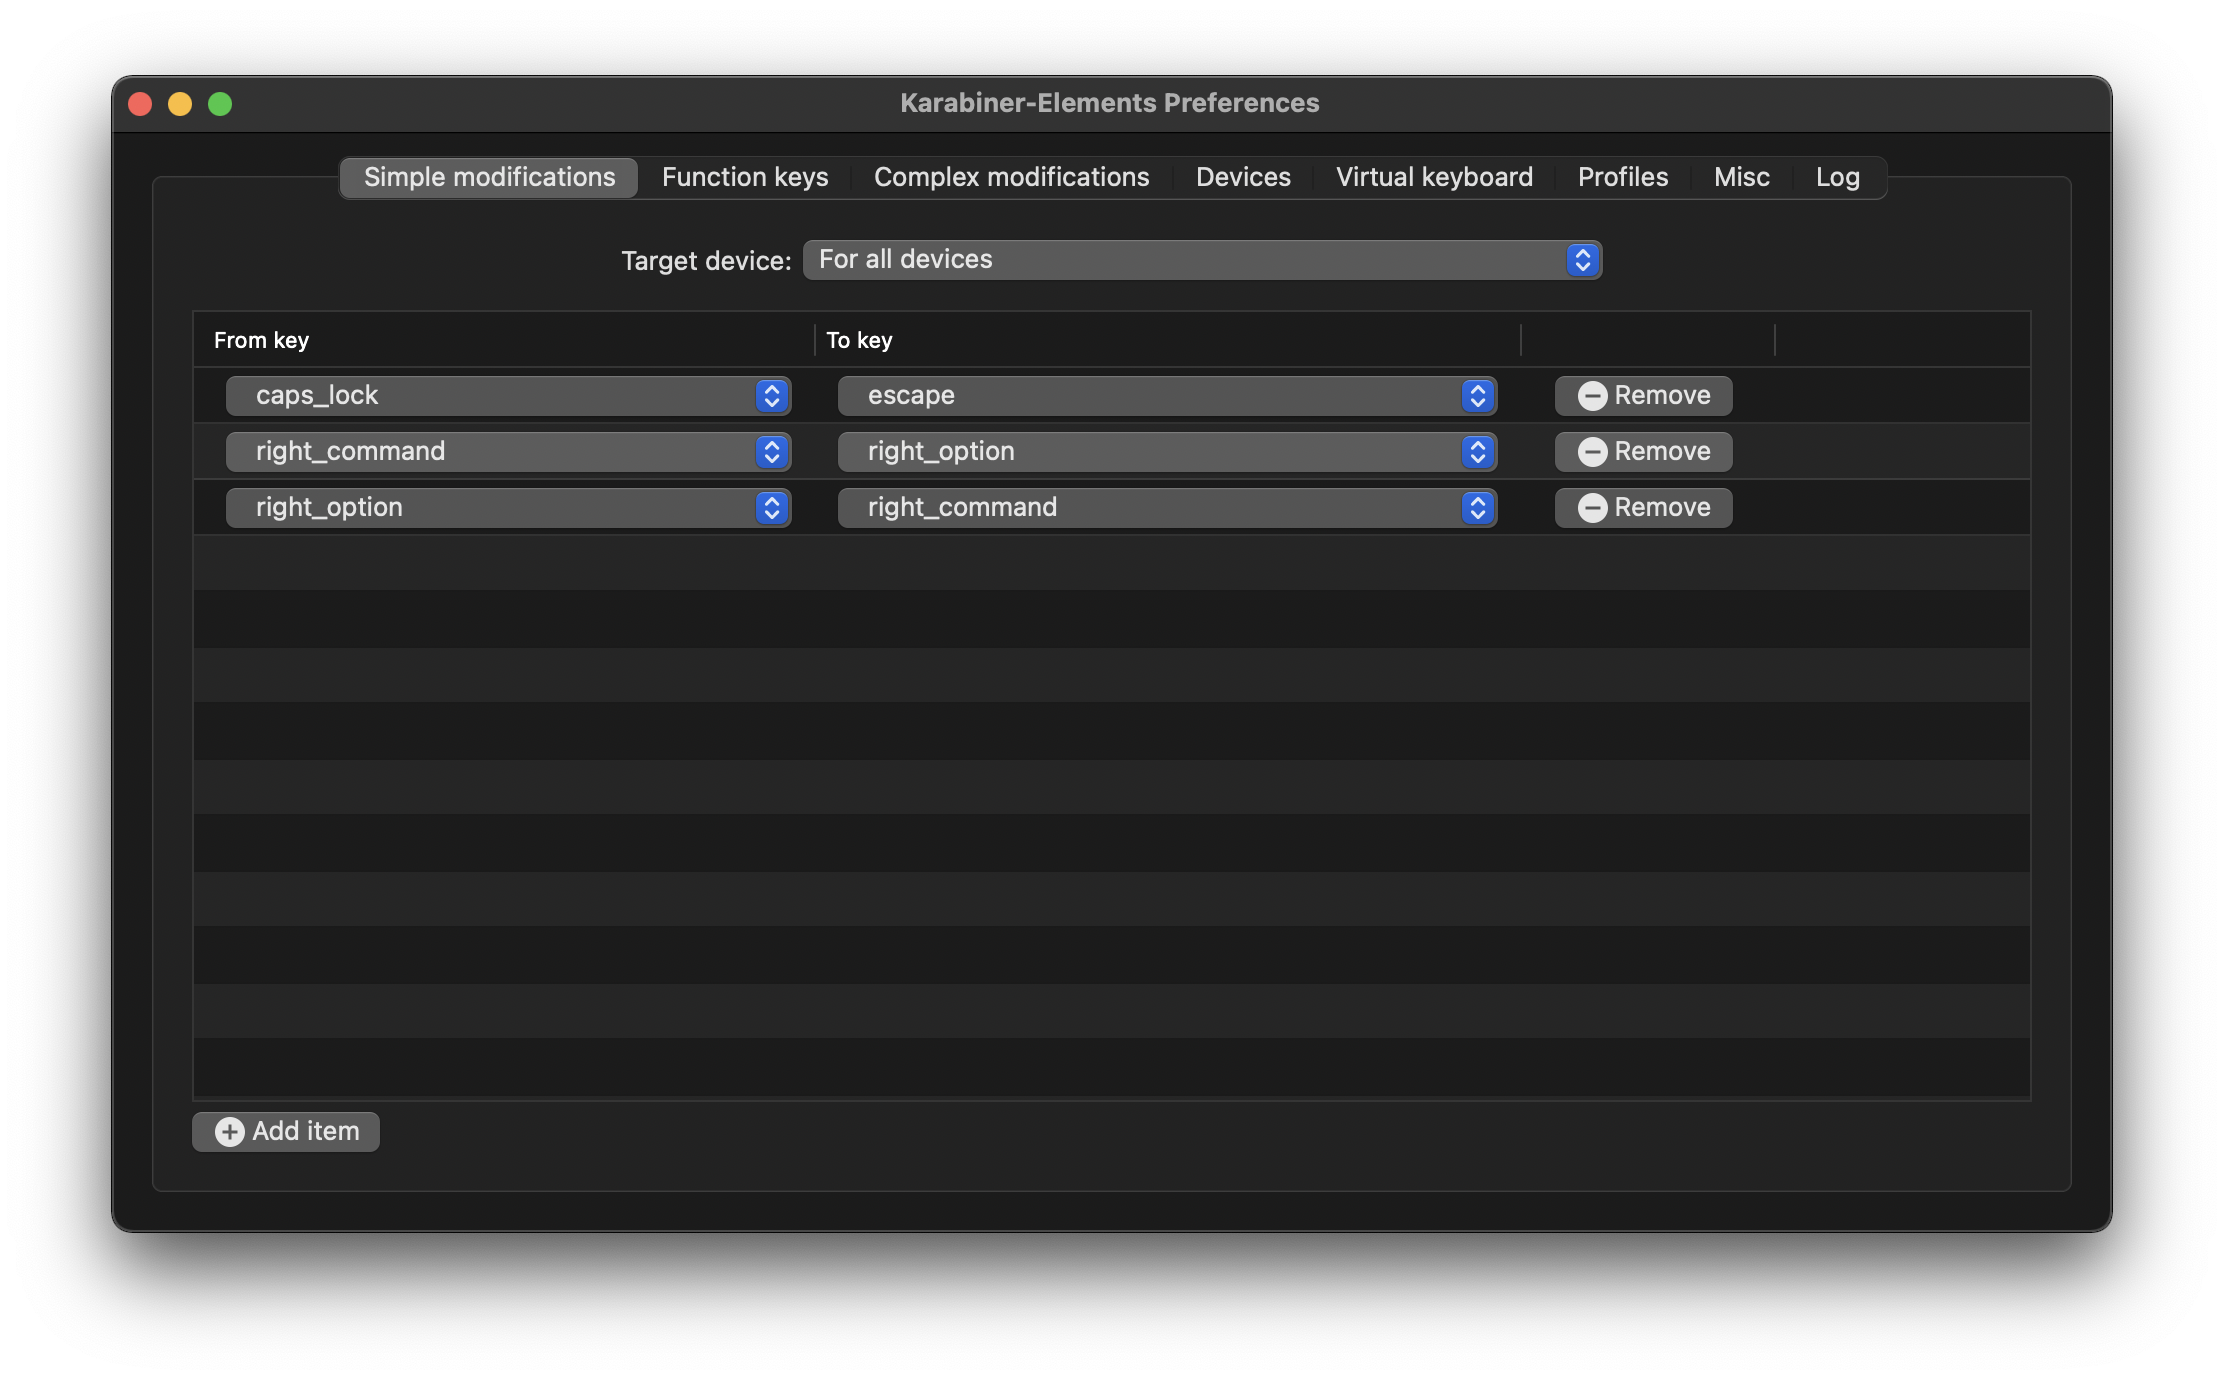
Of course I also remapped capslock as a secondary escape key, which is commonly required in Vim to leave insert mode. This also worked fine in the System Preferences for what it’s worth.
It’s unfortunate this modifier remapping has to be done with an external application, which can now read all my keyboard inputs system-wide, and thus has to be trusted.
Update: Thanks to Anriudh for suggesting an easier solution for the remapping. This file in ~/Library/LaunchAgents/com.local.KeyRemapping.plist takes care of the problem, no more Karabiner-Elements required:
<?xml version="1.0" encoding="UTF-8"?>
<!DOCTYPE plist PUBLIC "-//Apple//DTD PLIST 1.0//EN" "http://www.apple.com/DTDs/PropertyList-1.0.dtd">
<plist version="1.0">
<dict>
    <key>Label</key>
    <string>com.local.KeyRemapping</string>
    <key>ProgramArguments</key>
    <array>
        <string>/usr/bin/hidutil</string>
        <string>property</string>
        <string>--set</string>
        <string>{"UserKeyMapping":[

            {
              "HIDKeyboardModifierMappingSrc": 0x7000000E7,
              "HIDKeyboardModifierMappingDst": 0x7000000E6
            },

            {
              "HIDKeyboardModifierMappingSrc": 0x7000000E6,
              "HIDKeyboardModifierMappingDst": 0x7000000E7
            },

            {
              "HIDKeyboardModifierMappingSrc": 0x700000039,
              "HIDKeyboardModifierMappingDst": 0x700000029
            }

        ]}</string>
    </array>
    <key>RunAtLoad</key>
    <true/>
</dict>
</plist>
Deadkeys
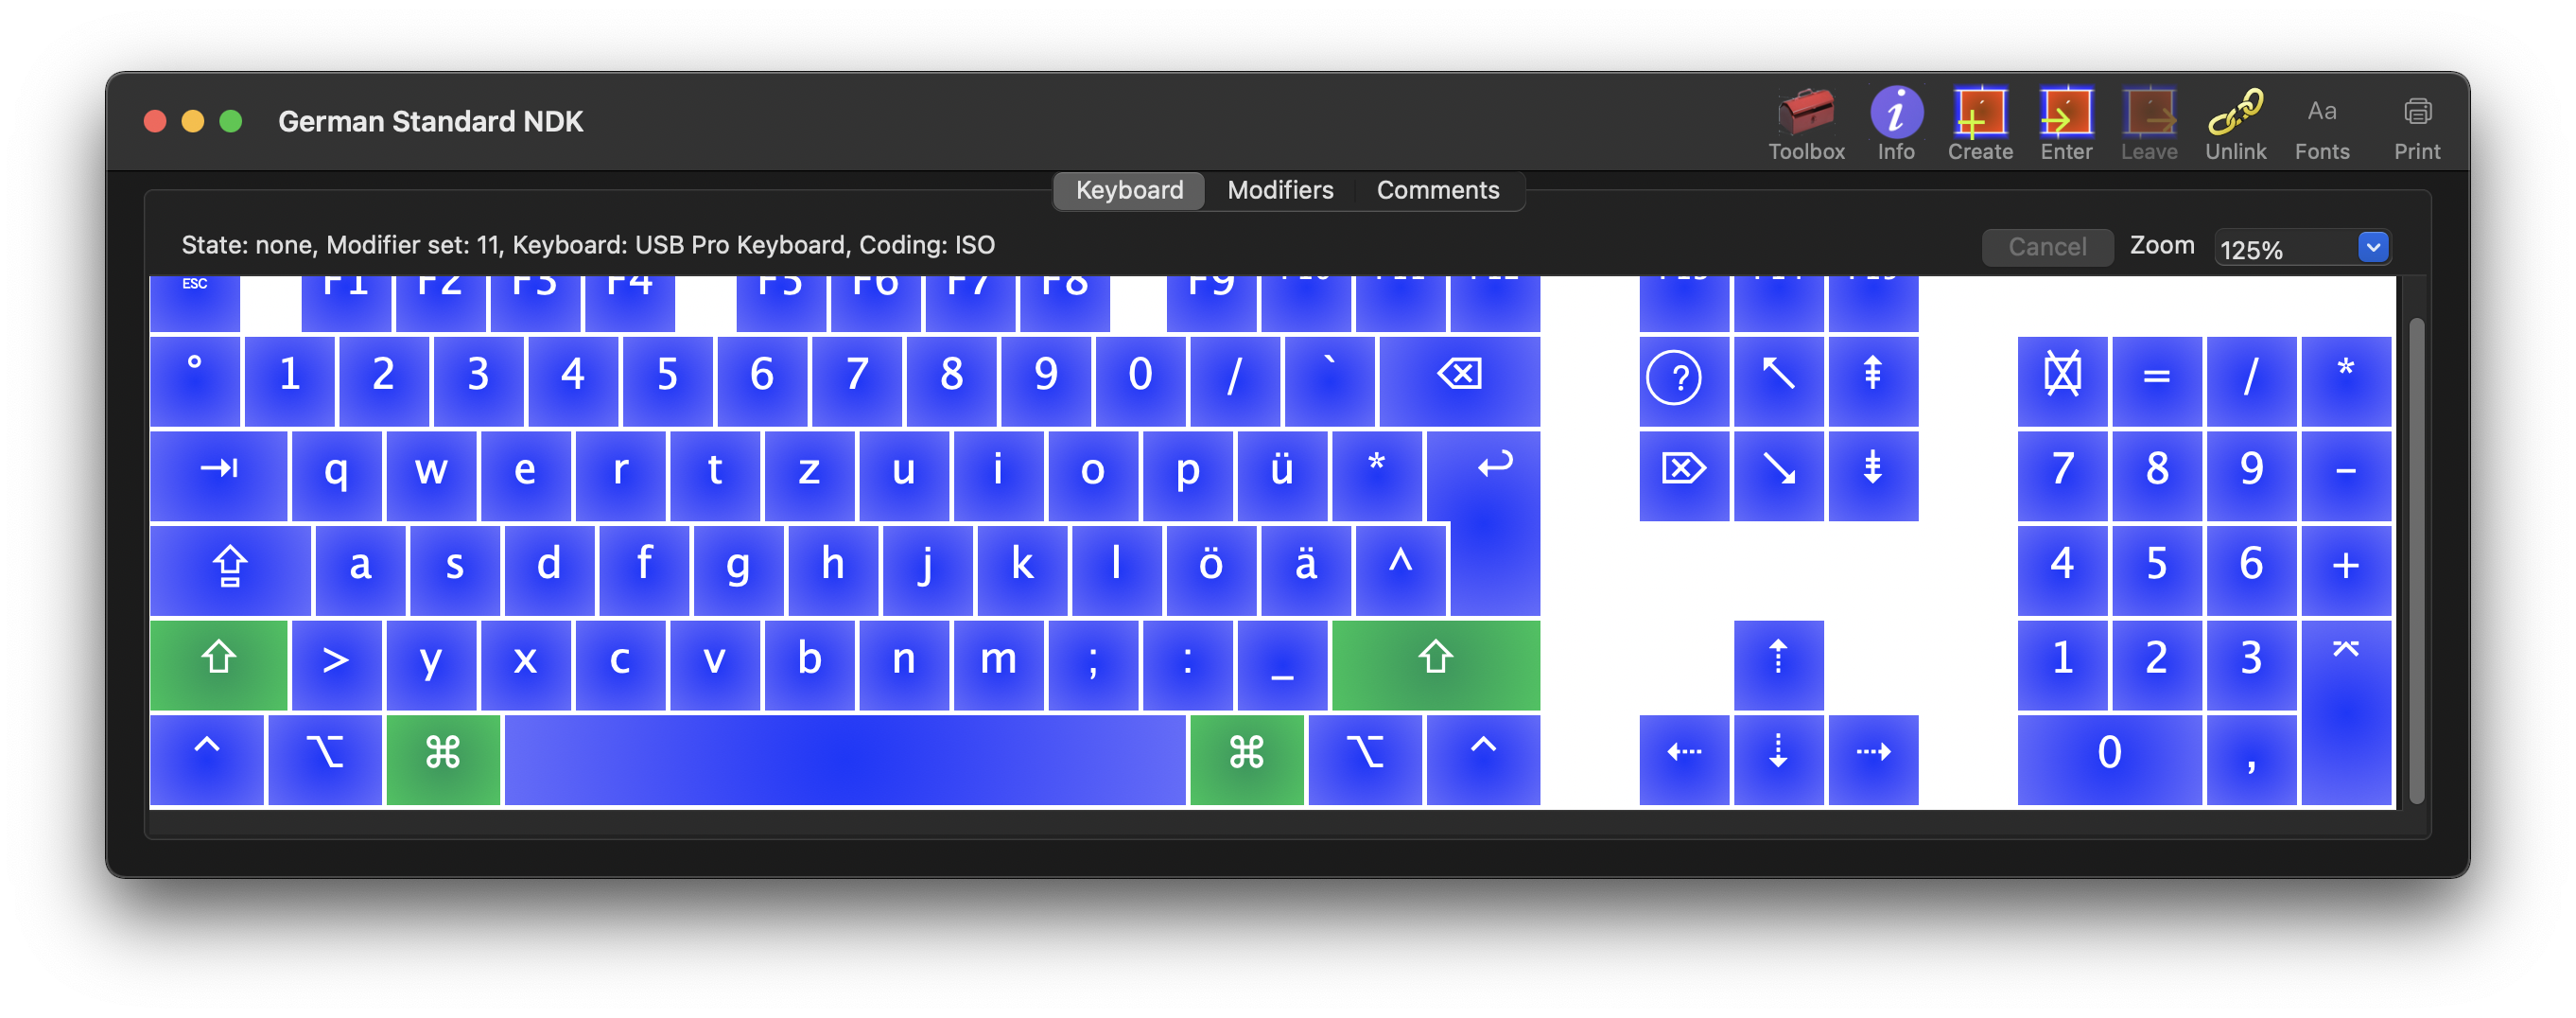
On Linux I’ve always been using a nodeadkeys keyboard layout, which means keys like ^ and ´ get output immediately instead of being combined with the next letter entered. There seems to be no support for this on macOS, so I had to make my own keyboard layout using Ukelele:
For remapping modifier keys Ukelele recommends still using Karabiner, so unfortunately we can’t solve all keyboard layout problems with a single new keyboard layout:
Warning!
Ukelele can change the output of special keys, but this doesn’t always work as expected, or for all applications. There are usually other ways to achieve what you want.
• If you want to rearrange the modifier keys, try System Preferences.
• If you want to make other modifications such as turning modifier keys into normal keys, or normal keys into modifier keys, Karabiner (https://pqrs.org/osx/karabiner/) can likely help you.
• If you would like to be able to use the F-keys (F1 through F19), then Better Touch Tool (https://www.boastr.net/) can probably help you.
This warning appears once per session, and does not stop you changing special key output.
Ukelele also allowed me to change command-spacebar from outputting a non breaking space (aka in HTML) to a regular space. It was easy to still have the option key pressed after writing a |
symbol on the German keyboard layout, so the following space often became a non breaking space for me, which threw off code linters. |
Finally the created keyboard layout bundle file can be copied into /Library/Keyboard Layouts/ and then be selected in the system settings. It seems not to work during the Login screen, but I don’t mind much.
Mouse
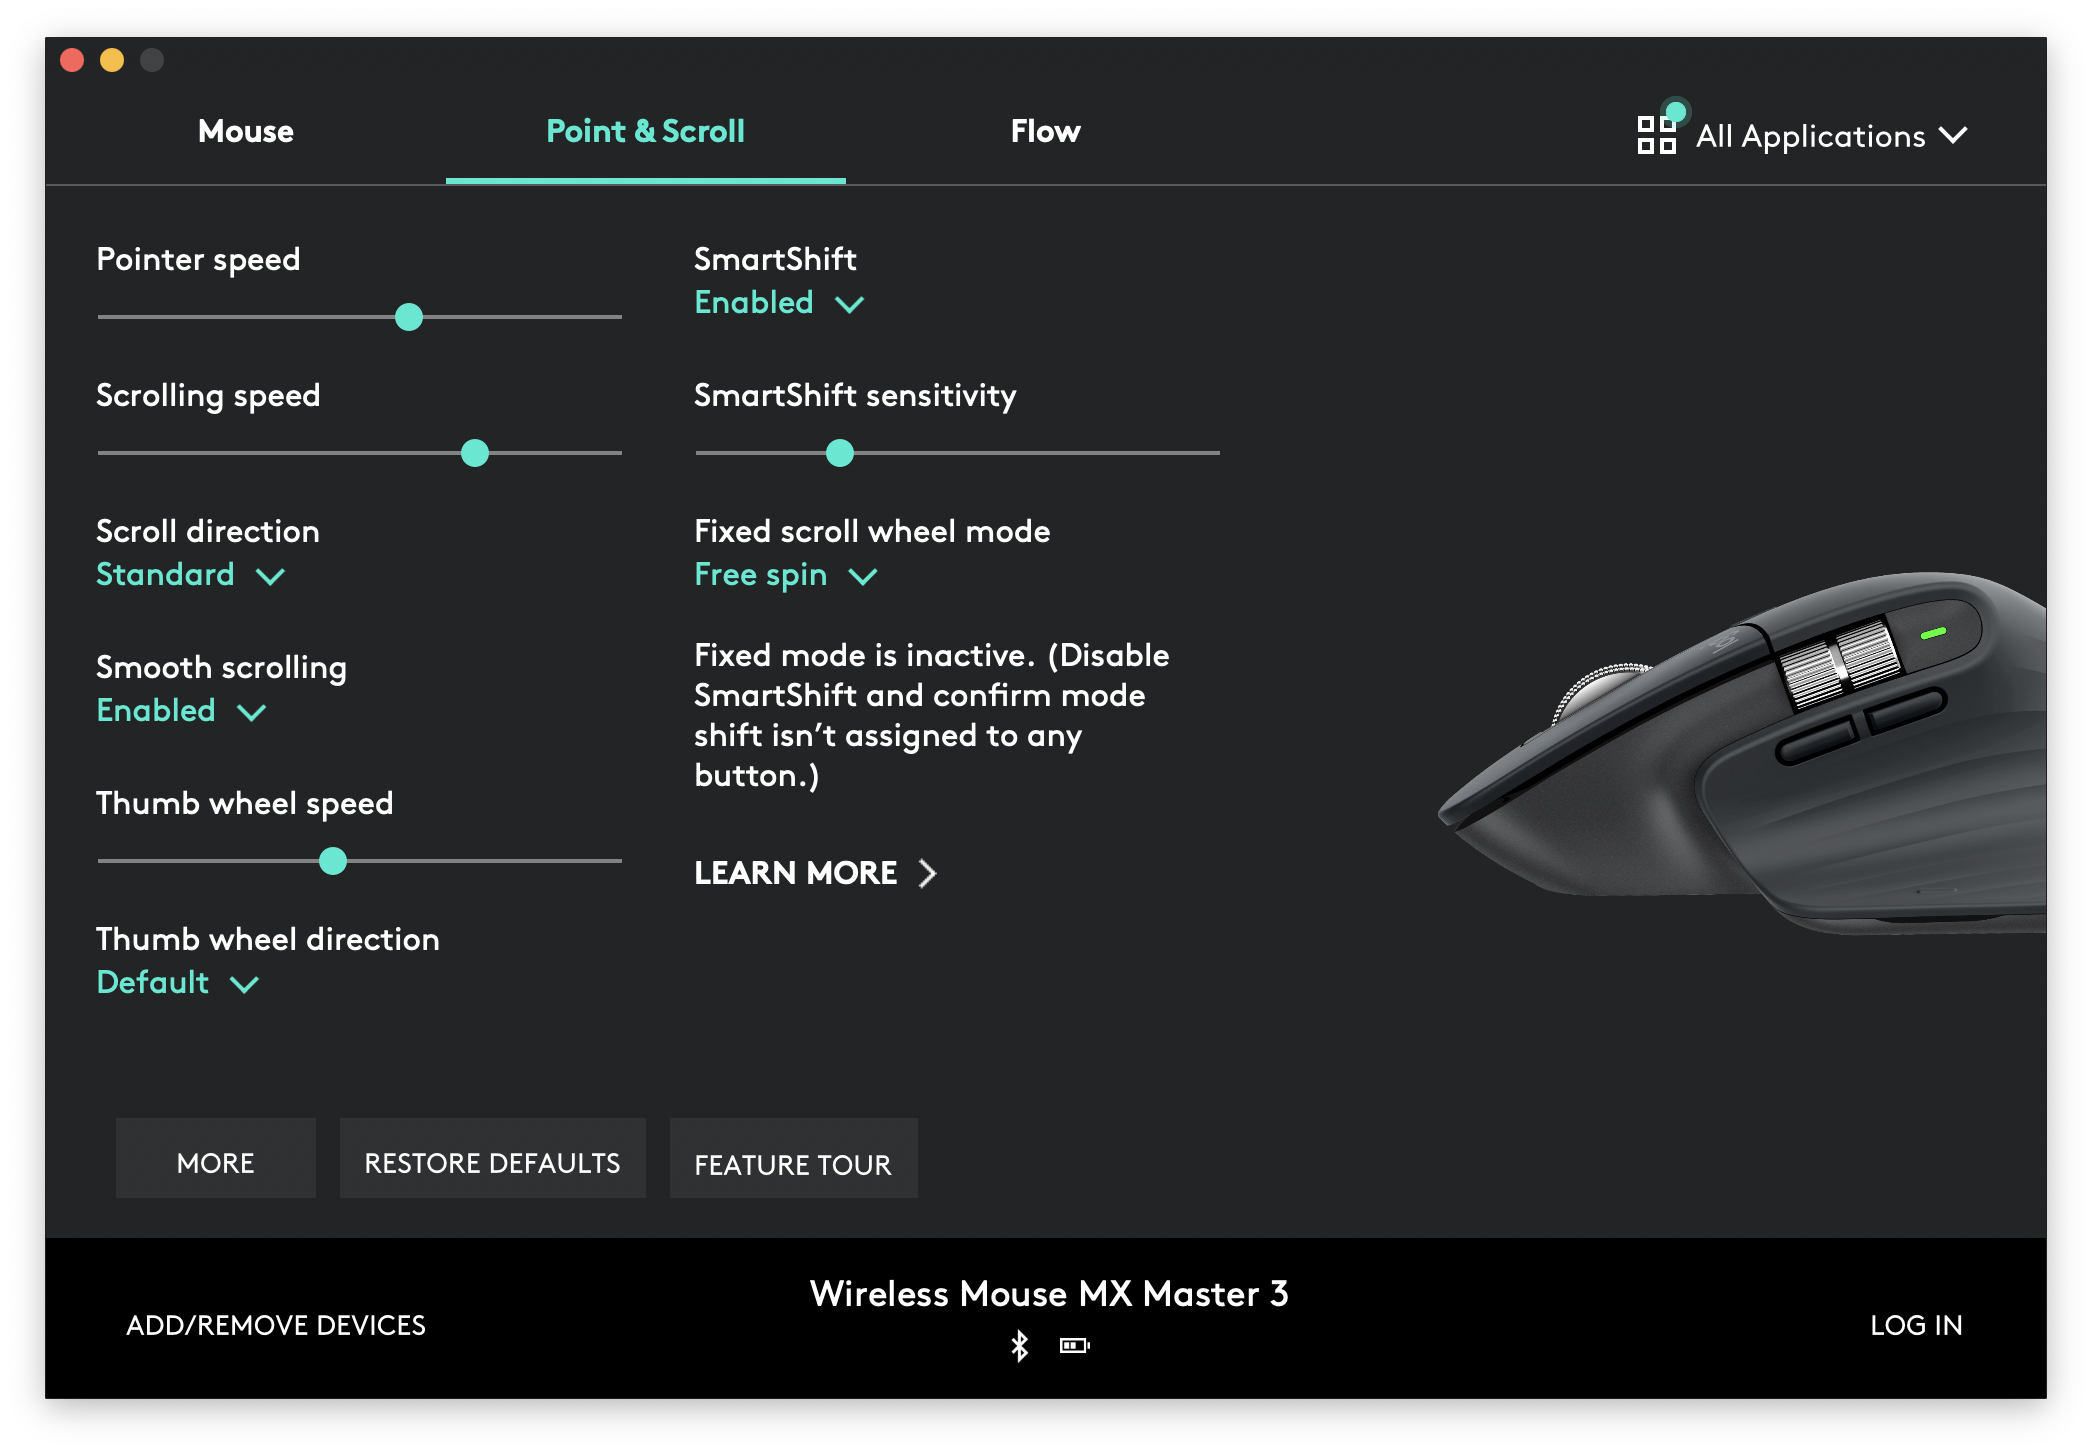
I’m using a Logitech MX Master 3 connected via Bluetooth. I want it to scroll normally (up means up, down means down). But I want to keep the “natural” scrolling direction of the touch pad, which works like scrolling on a smart phone, so you move two fingers up to scroll down, two fingers down to scroll up. With the system-wide settings it seems only possible to change this for both the touchpad and the mouse at once.
Logitech Options luckily supports changing this just for the mouse, but always takes a few seconds at startup to register the device and start working.
Unfortunately the mouse scrolling seems to have an acceleration, which I have not been able to disable yet.
Update: Luc sent me this command which seems to improve the acceleration situation, but it still doesn’t feel as linear as on Linux:
defaults write .GlobalPreferences com.apple.scrollwheel.scaling -1Update: Thanks to Kristjan for suggesting LinearMouse, which solves the acceleration problem for me. No more Logitech Options required either to reverse scrolling wheel on mouse only.
Update 2: LinearMouse is somehow limiting my mouse wheel speed when scrolling very quickly, so I still prefer Logitech Options.
Putting the display to sleep easily by moving the mouse cursor in the corner is nice (I’d still prefer a keyboard shortcut), and can be enabled in the system preferences:

Task bar
I use Stats to display some network and CPU statistics in the task bar, works solidly so far and has replaced conky for me.

Firefox & Web
Safari doesn’t support uBlock Origin, see this explanation by ghost:
Very quick tl;dr: uBO will no longer work with Safari, use Firefox or a new “content blocker” app (see below for good replacements).
So this made the choice easy for me, since Chrome will also phase out uBlock Origin support. I simply kept using Firefox with my essential addons: uBlock Origin and my password manager Bitwarden.
I figured out that it’s quite easy to have my command line email client mutt preview HTML emails inline, but still open Firefox by pressing m on the HTML part, by adding this to my .mailcap file:
text/html; /Applications/Firefox.app/Contents/MacOS/firefox '%s' &; needsterminal
text/html; links -dump %s; needsterminal; copiousoutput;
To handle URLs and other texts copied on the command line automatically, pbpaste/pbcopy replace xclip as the clipboard access tools on macOS. Downloading a video from the URL in clipboard for example:
pbpaste|xargs yt-dlp --Music
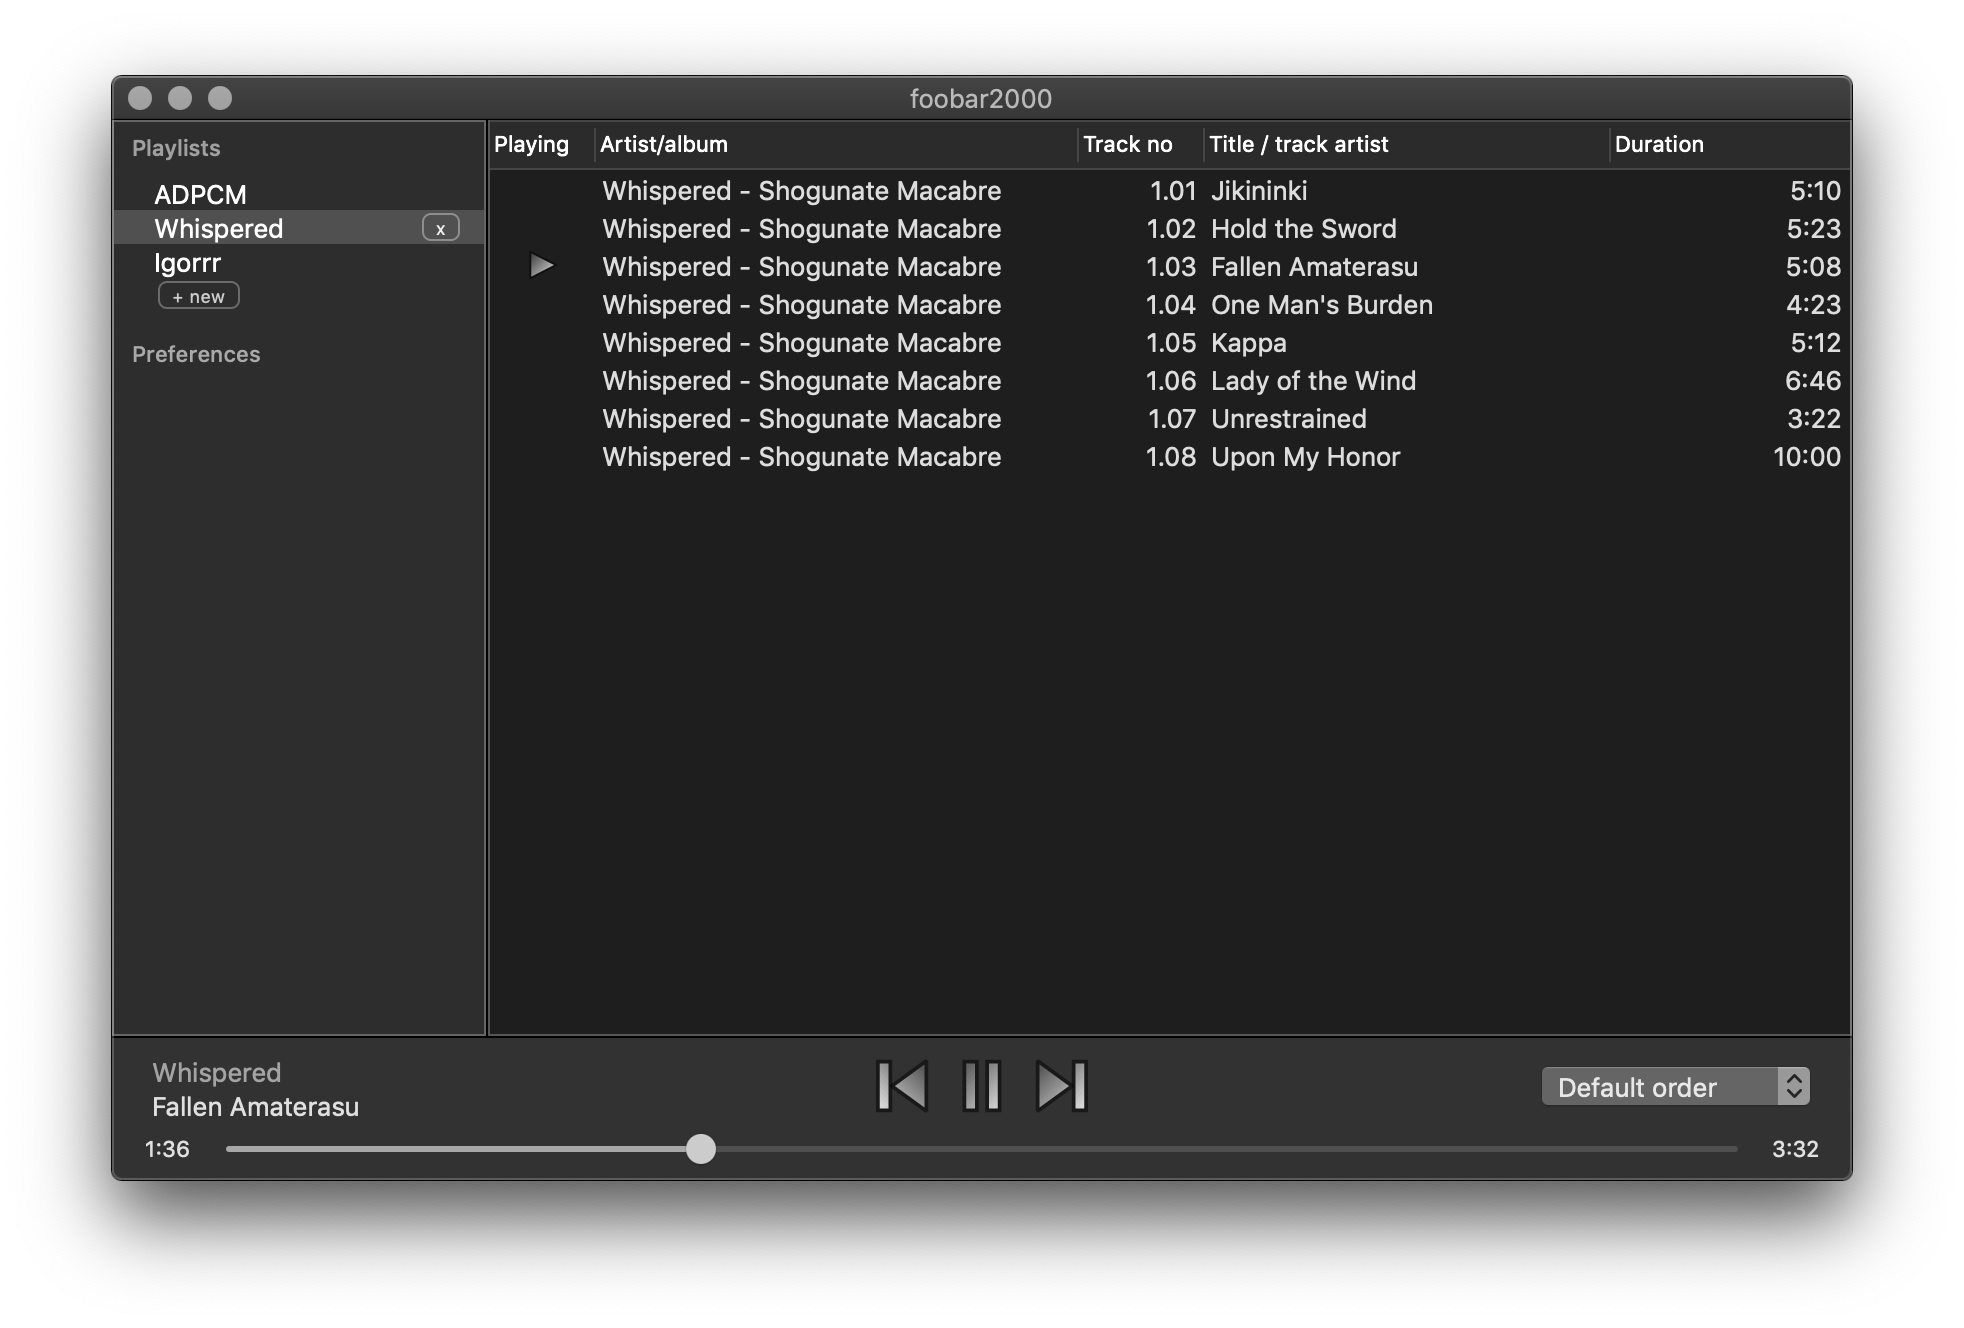
I tried using the integrated Music application, but it kept struggling to import my music database. This might have been slow since I connected to it using macFUSE & SSHFS. I don’t need a fancy music player anyway and remembered that > 15 years ago I used to use Foobar2000 on Windows. It’s still around and there is a macOS version, so I’m just using that for now.
With a longer read-ahead I haven’t had any pauses in music playback so far, even though the sshfs connection is over the internet. Sound quality of the MacBook is fine, I haven’t noticed any problems and the dedicated headphone jack is appreciated (as is the half-size SD card slot for loading music onto the SD card for my car’s stereo).
The audio volume controls are a bit too coarse-grained for me, but using shift-option-F11/F12 allows for a few more steps when setting the volume.
Translations
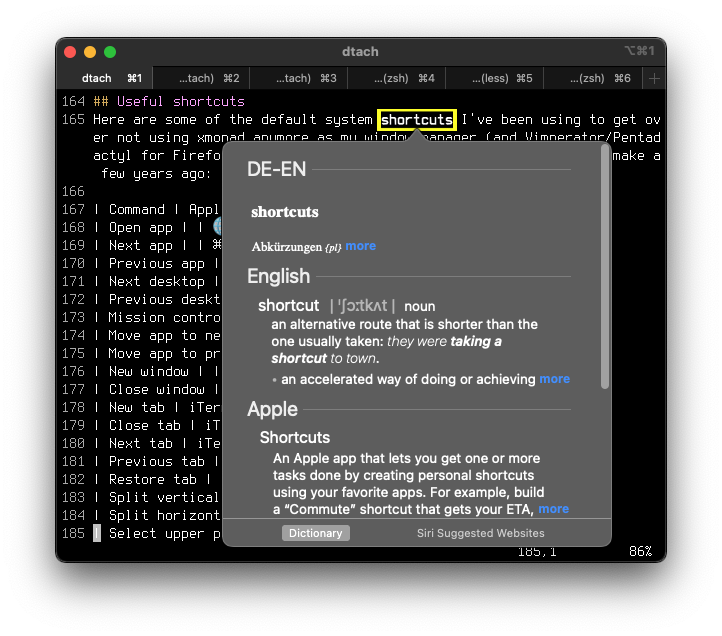
I used to use rdictcc to easily access the excellent German-English translations from wiki-like dictionary service dict.cc. There is a dict.cc plugin for the macOS dictionary which I am now using instead.
On macOS translations are easily accessible by holding the mouse over a word or a selected term and pressing control-command-d.
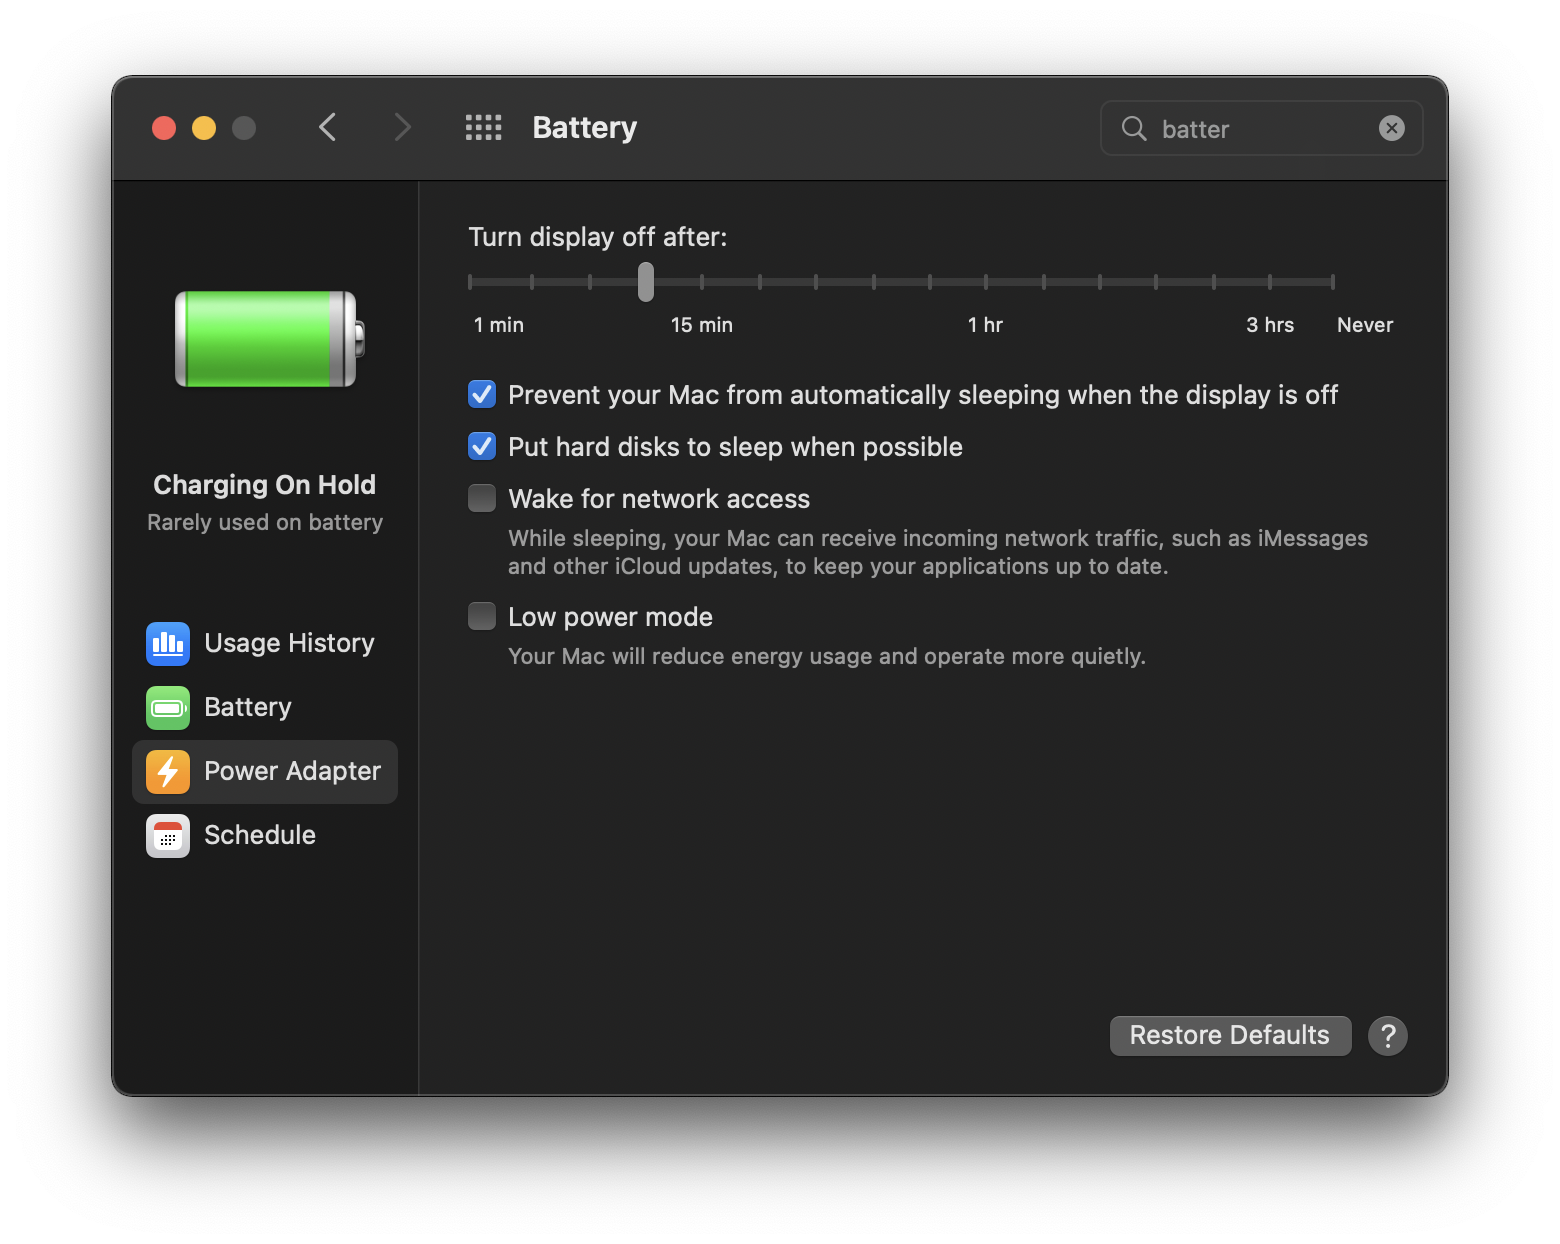
Standby
To get system standby not to wake up constantly I had to disable “Wake for network access” in Battery settings:
 I also previously set
defaults write /Library/Preferences/com.apple.mDNSResponder.plist NoMulticastAdvertisements -bool YESsince the DNS responder kept waking up the system according to pmset -g log|grep "Wake Requests", but this might also be fixed by the “Wake for network access” setting.
Useful shortcuts
Here are some of the default system shortcuts I’ve been using to get over not using xmonad anymore as my window manager (and Vimperator/Pentadactyl for Firefox respectively, but that switch I already had to make a few years ago):
| Command | Application | Shortcut |
| Open app | 🌐 F4 | |
| Next app | ⌘ ⇥ | |
| Previous app | ⇧ ⌘ ⇥ | |
| Next desktop | ⌃ ► | |
| Previous desktop | ⌃ ◄ | |
| Mission control | ⌃ ▲ / 🌐 F3 | |
| Move app to next desktop | Click and hold title bar, ⌃ ► | |
| Move app to previous desktop | Click and hold title bar, ⌃ ◄ | |
| New window | ⌘ N | |
| Close window | ⌘ Q | |
| Move focus to next window | ⌘ ` | |
| New tab | iTerm, Firefox | ⌘ T |
| Close tab | iTerm, Firefox | ⌘ W |
| Next tab | iTerm, Firefox | ⌃ ⇥ |
| Previous tab | iTerm, Firefox | ⇧ ⌃ ⇥ |
| Restore tab | Firefox | ⇧ ⌘ T |
| Split vertically | iTerm | ⌘ D |
| Split horizontally | iTerm | ⇧ ⌘ D |
| Select upper pane | iTerm | ⌥ ⌘ ▲ |
| Select lower pane | iTerm | ⌥ ⌘ ▼ |
| Select right pane | iTerm | ⌥ ⌘ ► |
| Select left pane | iTerm | ⌥ ⌘ ◄ |
| Increase font size | iTerm, Firefox | ⌘ + |
| Decrease font size | iTerm, Firefox | ⌘ - |
| Search | ⌘ F | |
| Copy | ⌘ C | |
| Cut | ⌘ X | |
| Paste | ⌘ V | |
| Save | ⌘ S | |
| Select all | ⌘ A | |
| Select URL field | Firefox | ⌘ L |
| Open URL | iTerm | ⌘ Left mouse click |
| Dictionary lookup | ⌃ ⌘ D | |
| Take screenshot of area | ⇧ ⌘ 4 | |
| Take screenshot of window | ⇧ ⌘ 4, ⎵ | |
| Increase volume slightly | ⇧ ⌥ F12 | |
| Decrease volume slightly | ⇧ ⌥ F11 |
And since some keys are missing on the MacBook keyboard here is how to get them:
| Key | Shortcut |
| Page up | 🌐 ▲ |
| Page down | 🌐 ▼ |
| Home | 🌐 ◄ |
| End | 🌐 ► |
| Delete | 🌐 ⌫ |
| Insert | 🌐 ⏎ |
Conclusion
macOS is working better than expected for me so far, and definitely better than Windows would. So I’m glad with my choice of a MacBook Pro as a work device. Now that I’ve written down some of the steps I had to take to make it more usable, I hopefully won’t forget them if I ever have to set a macOS based system up again. If you have any questions or tips get in touch with me at [email protected].
Discussion on Hacker News.